Stripe Connect Onboarding Walkthrough
A complete step-by-step visual guide to setting up your Stripe account for restaurant payouts.
When you click "Finish Stripe setup" or "Connect with Stripe" from Step 6 of your business onboarding, you are redirected to Stripe's secure onboarding flow.
This guide walks you through every screen of the onboarding process with real screenshots so you know exactly what information to provide and what to expect.
Overview of the Flow
Stripe Connect requires a one-time verification to comply with financial regulations and enable direct payouts to your bank account:
- Business Type — Select whether you are operating as an individual/sole proprietorship or a registered company.
- Personal Details — Verify your legal identity (name, date of birth, home address, phone, and SSN/tax ID).
- Business Details — Specify your business industry and website URL.
- Payout Account — Connect your bank account or debit card for receiving automated payouts.
- Review & Agree — Review all entered information, accept the Stripe Connected Account agreement, and submit.
Step 1: Tell Us About Your Business
The first screen asks you to specify your legal business entity type and country of operation.
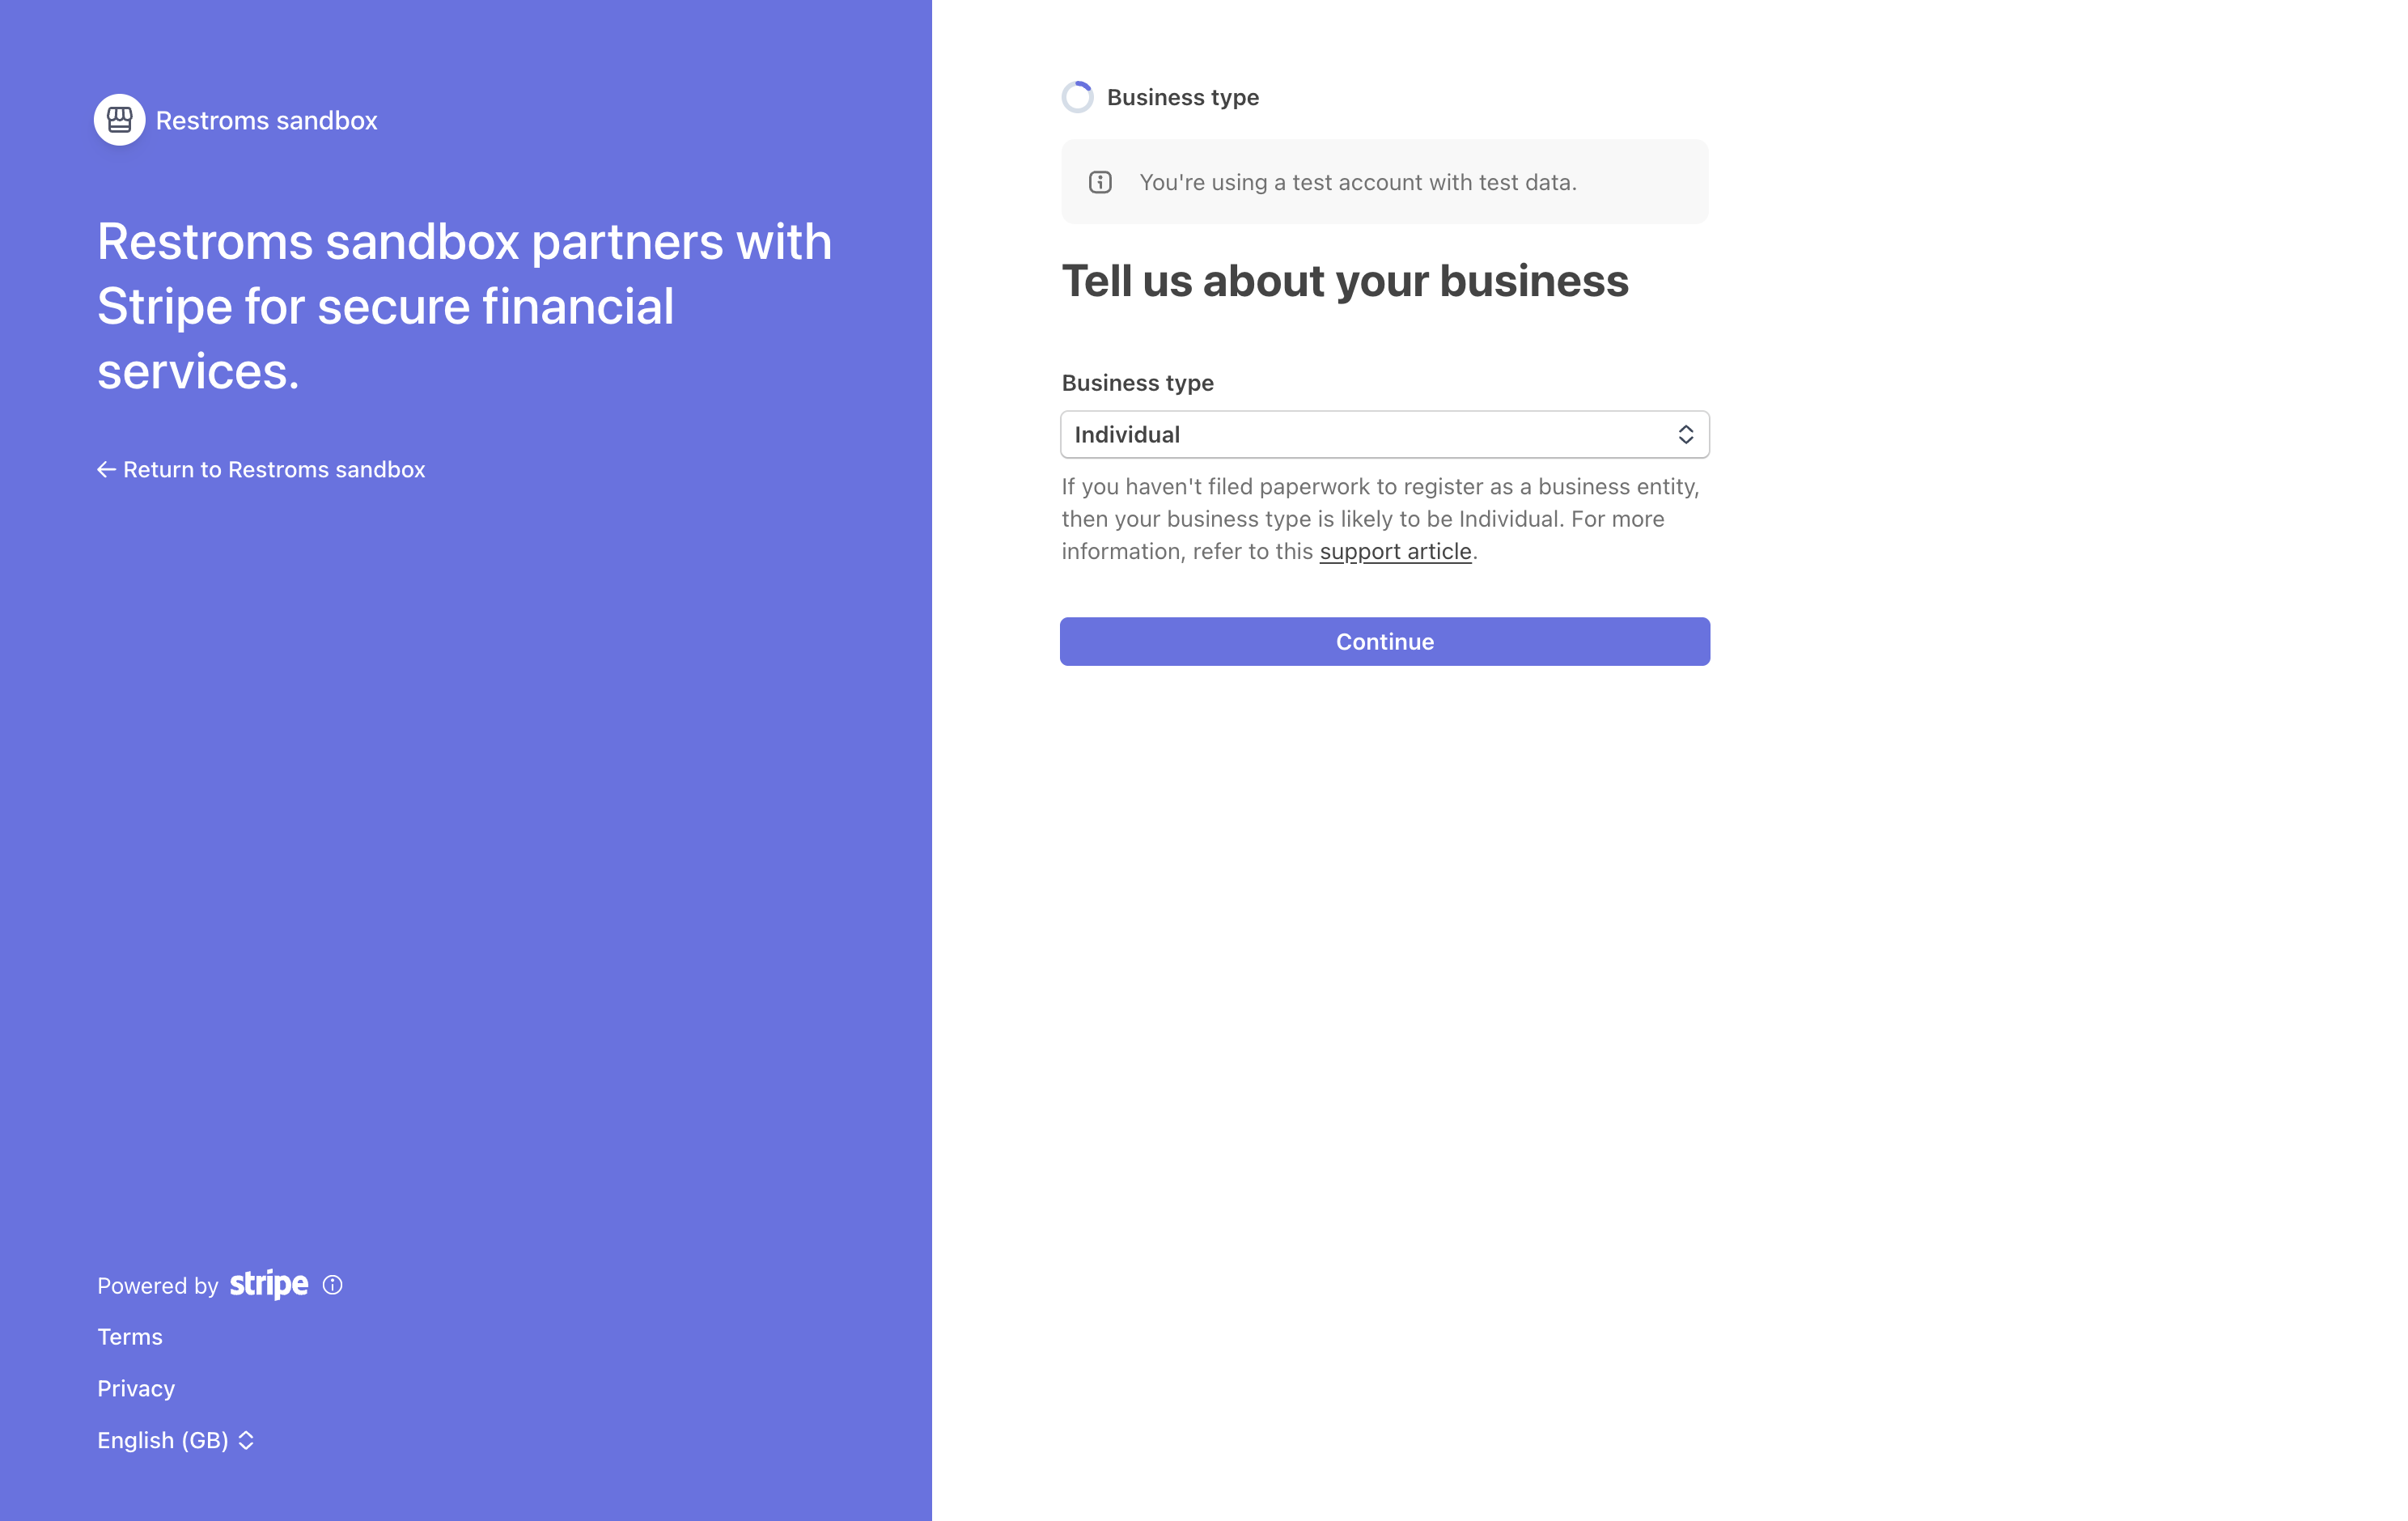
Key Fields & Instructions
| Field | Recommended Selection | Details |
|---|---|---|
| Location / Country | United States (or your registered country) | Country where your business or tax residency is located. |
| Type of business | Individual or sole proprietorship or Company | Choose Individual if you are operating without a formal corporate entity (LLC/Corp). Choose Company if you have an EIN/registered business entity. |
Press Continue to move to the identity verification screen.
Step 2: Verify Your Personal Details
To satisfy financial Know Your Customer (KYC) compliance, Stripe requires identity verification for the account owner or representative.
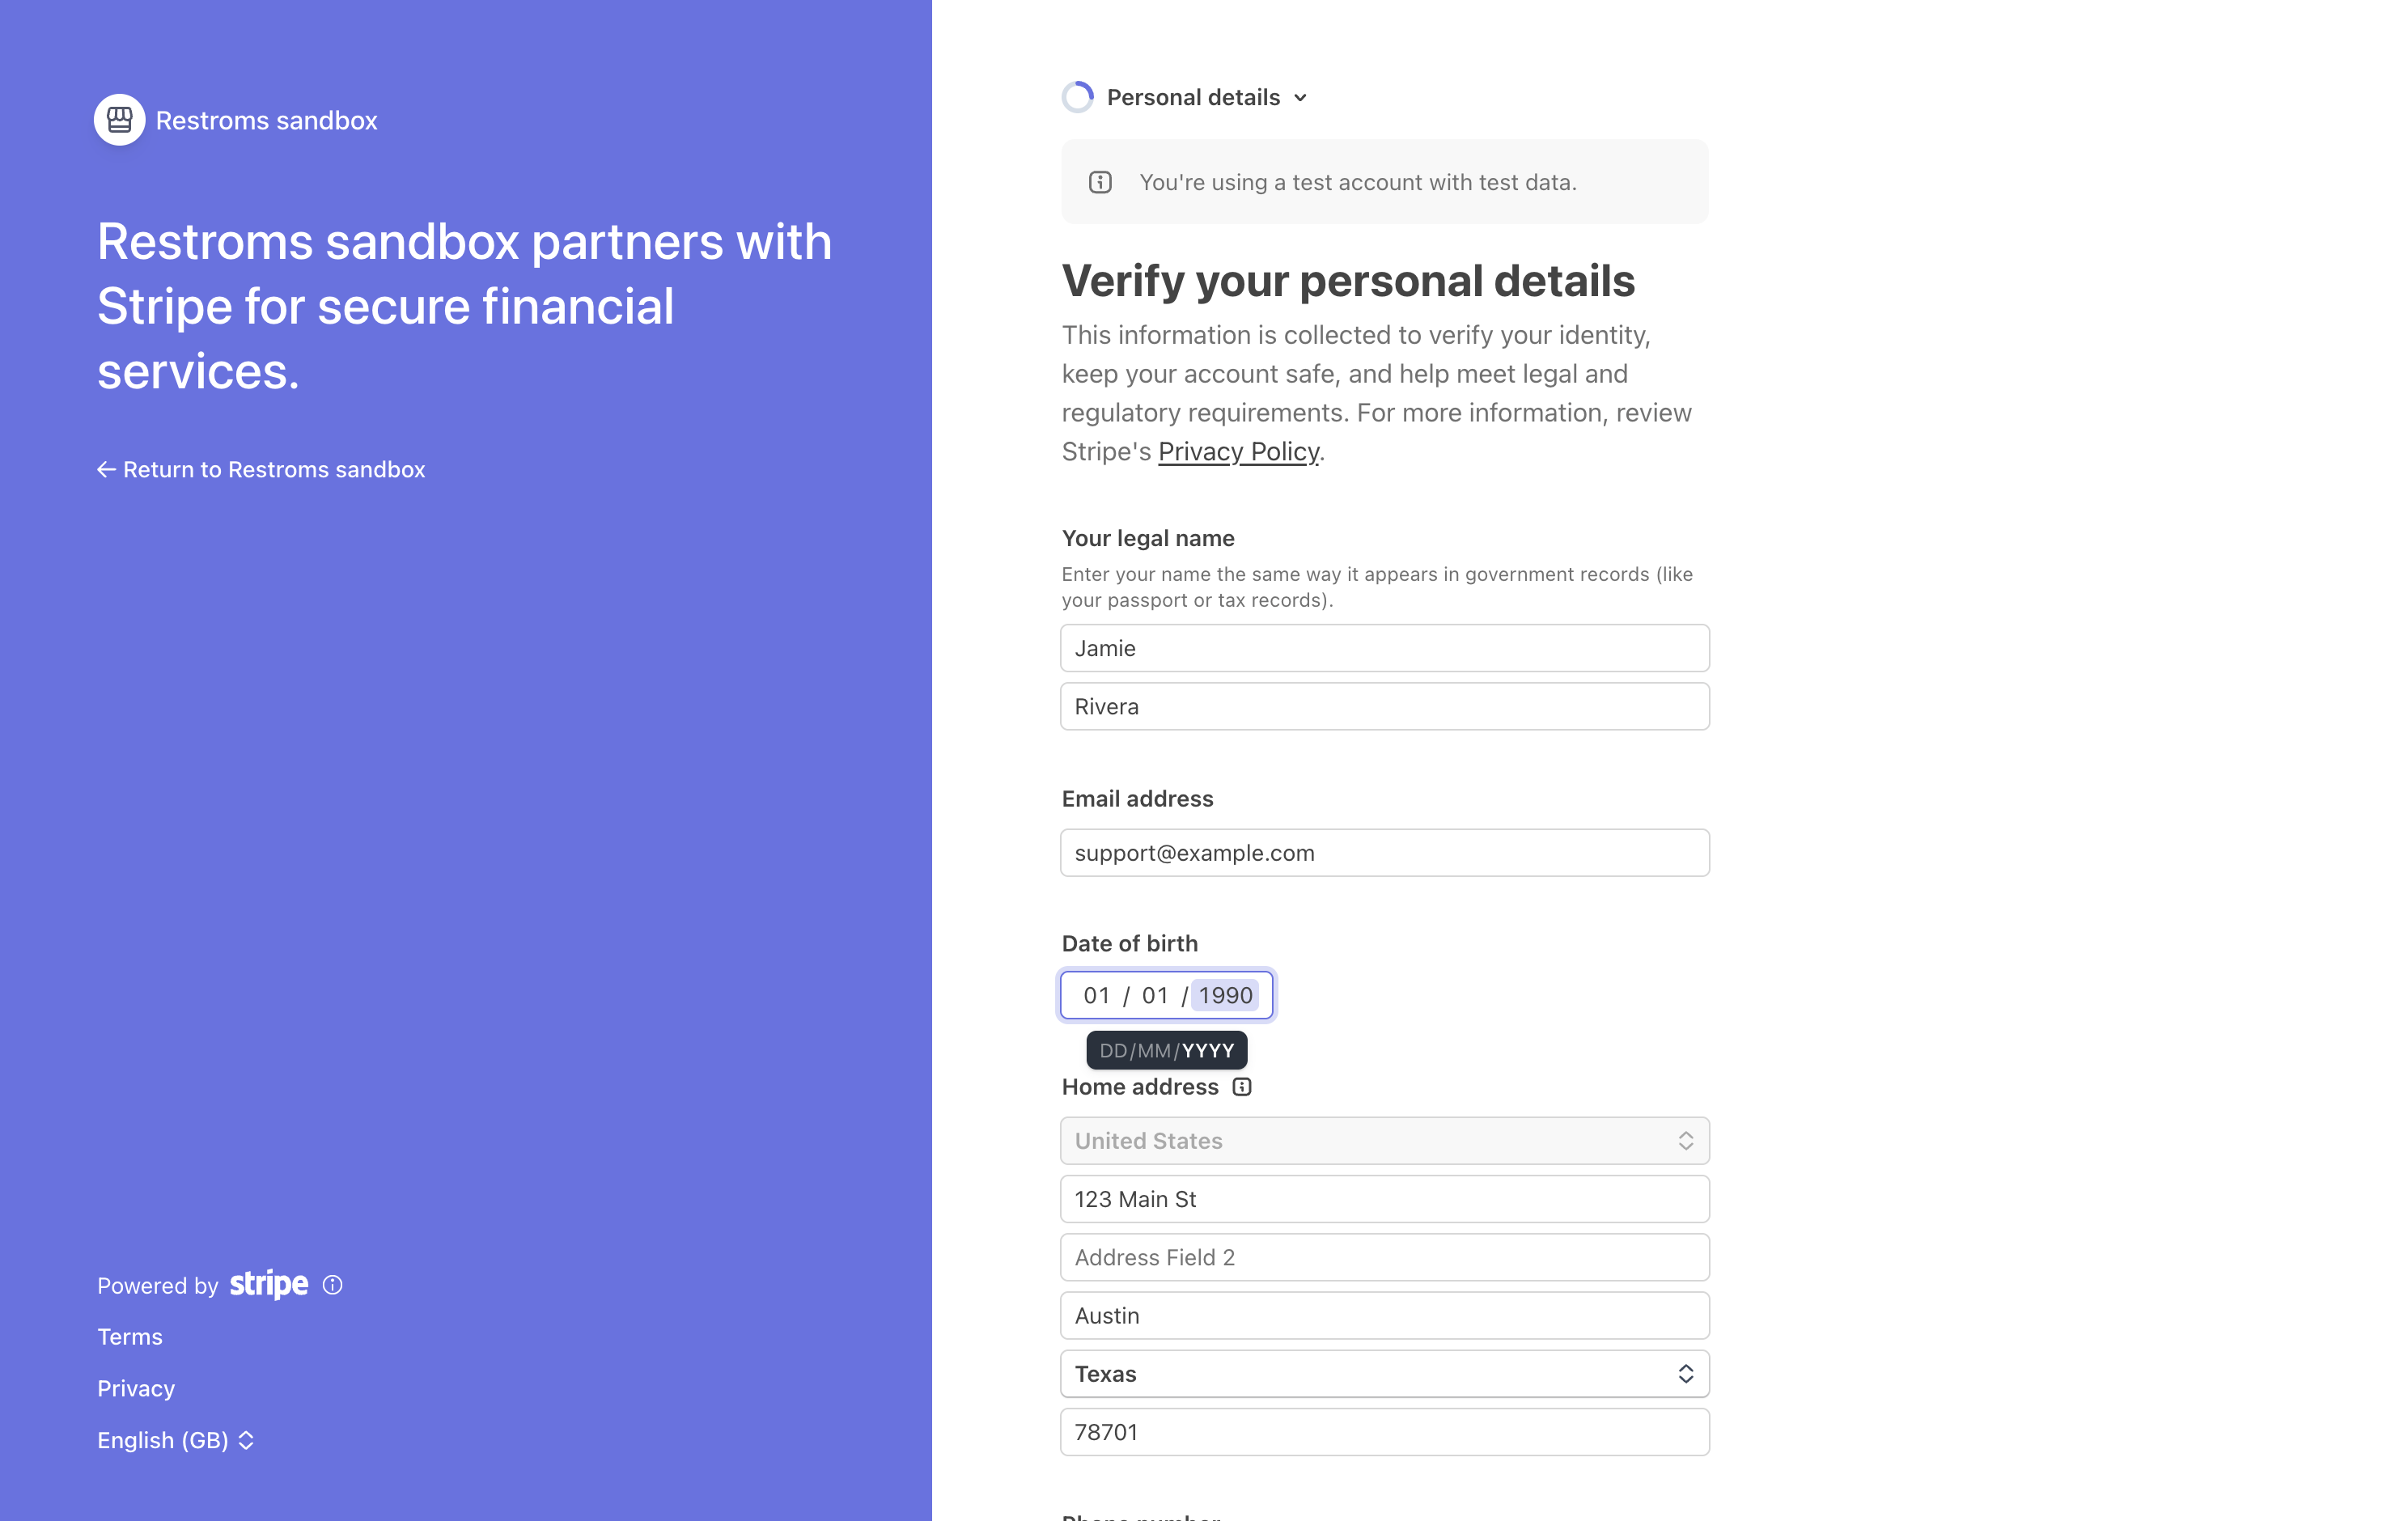
Key Fields & Instructions
| Field | Description | Test Mode vs Live Mode |
|---|---|---|
| Legal name | Your full legal first and last name. | In test mode: Any test name (e.g. Jamie Rivera). |
| Email address | Support or primary notification email. | Pre-filled from your registration. |
| Date of birth | Must verify you are at least 18 years of age (MM / DD / YYYY). | In test mode: 01 / 01 / 1990. |
| Home address | Your legal residential address. | In test mode: 123 Main St, Austin, TX 78701. |
| Phone number | Mobile number used for SMS two-factor authentication. | Valid SMS-capable phone number. |
| Social Security Number / Tax ID | Last 4 digits of SSN (or full SSN / EIN for companies). | In test mode: Enter 0000. In live mode: Your real government tax ID. |
Privacy & Security: All personal data and tax IDs are transmitted directly to Stripe via end-to-end encryption. HappyVoice never sees, stores, or handles your sensitive identity documents.
Step 3: Business Details & Industry
Stripe asks for details about your business products and services to properly classify your merchant profile.
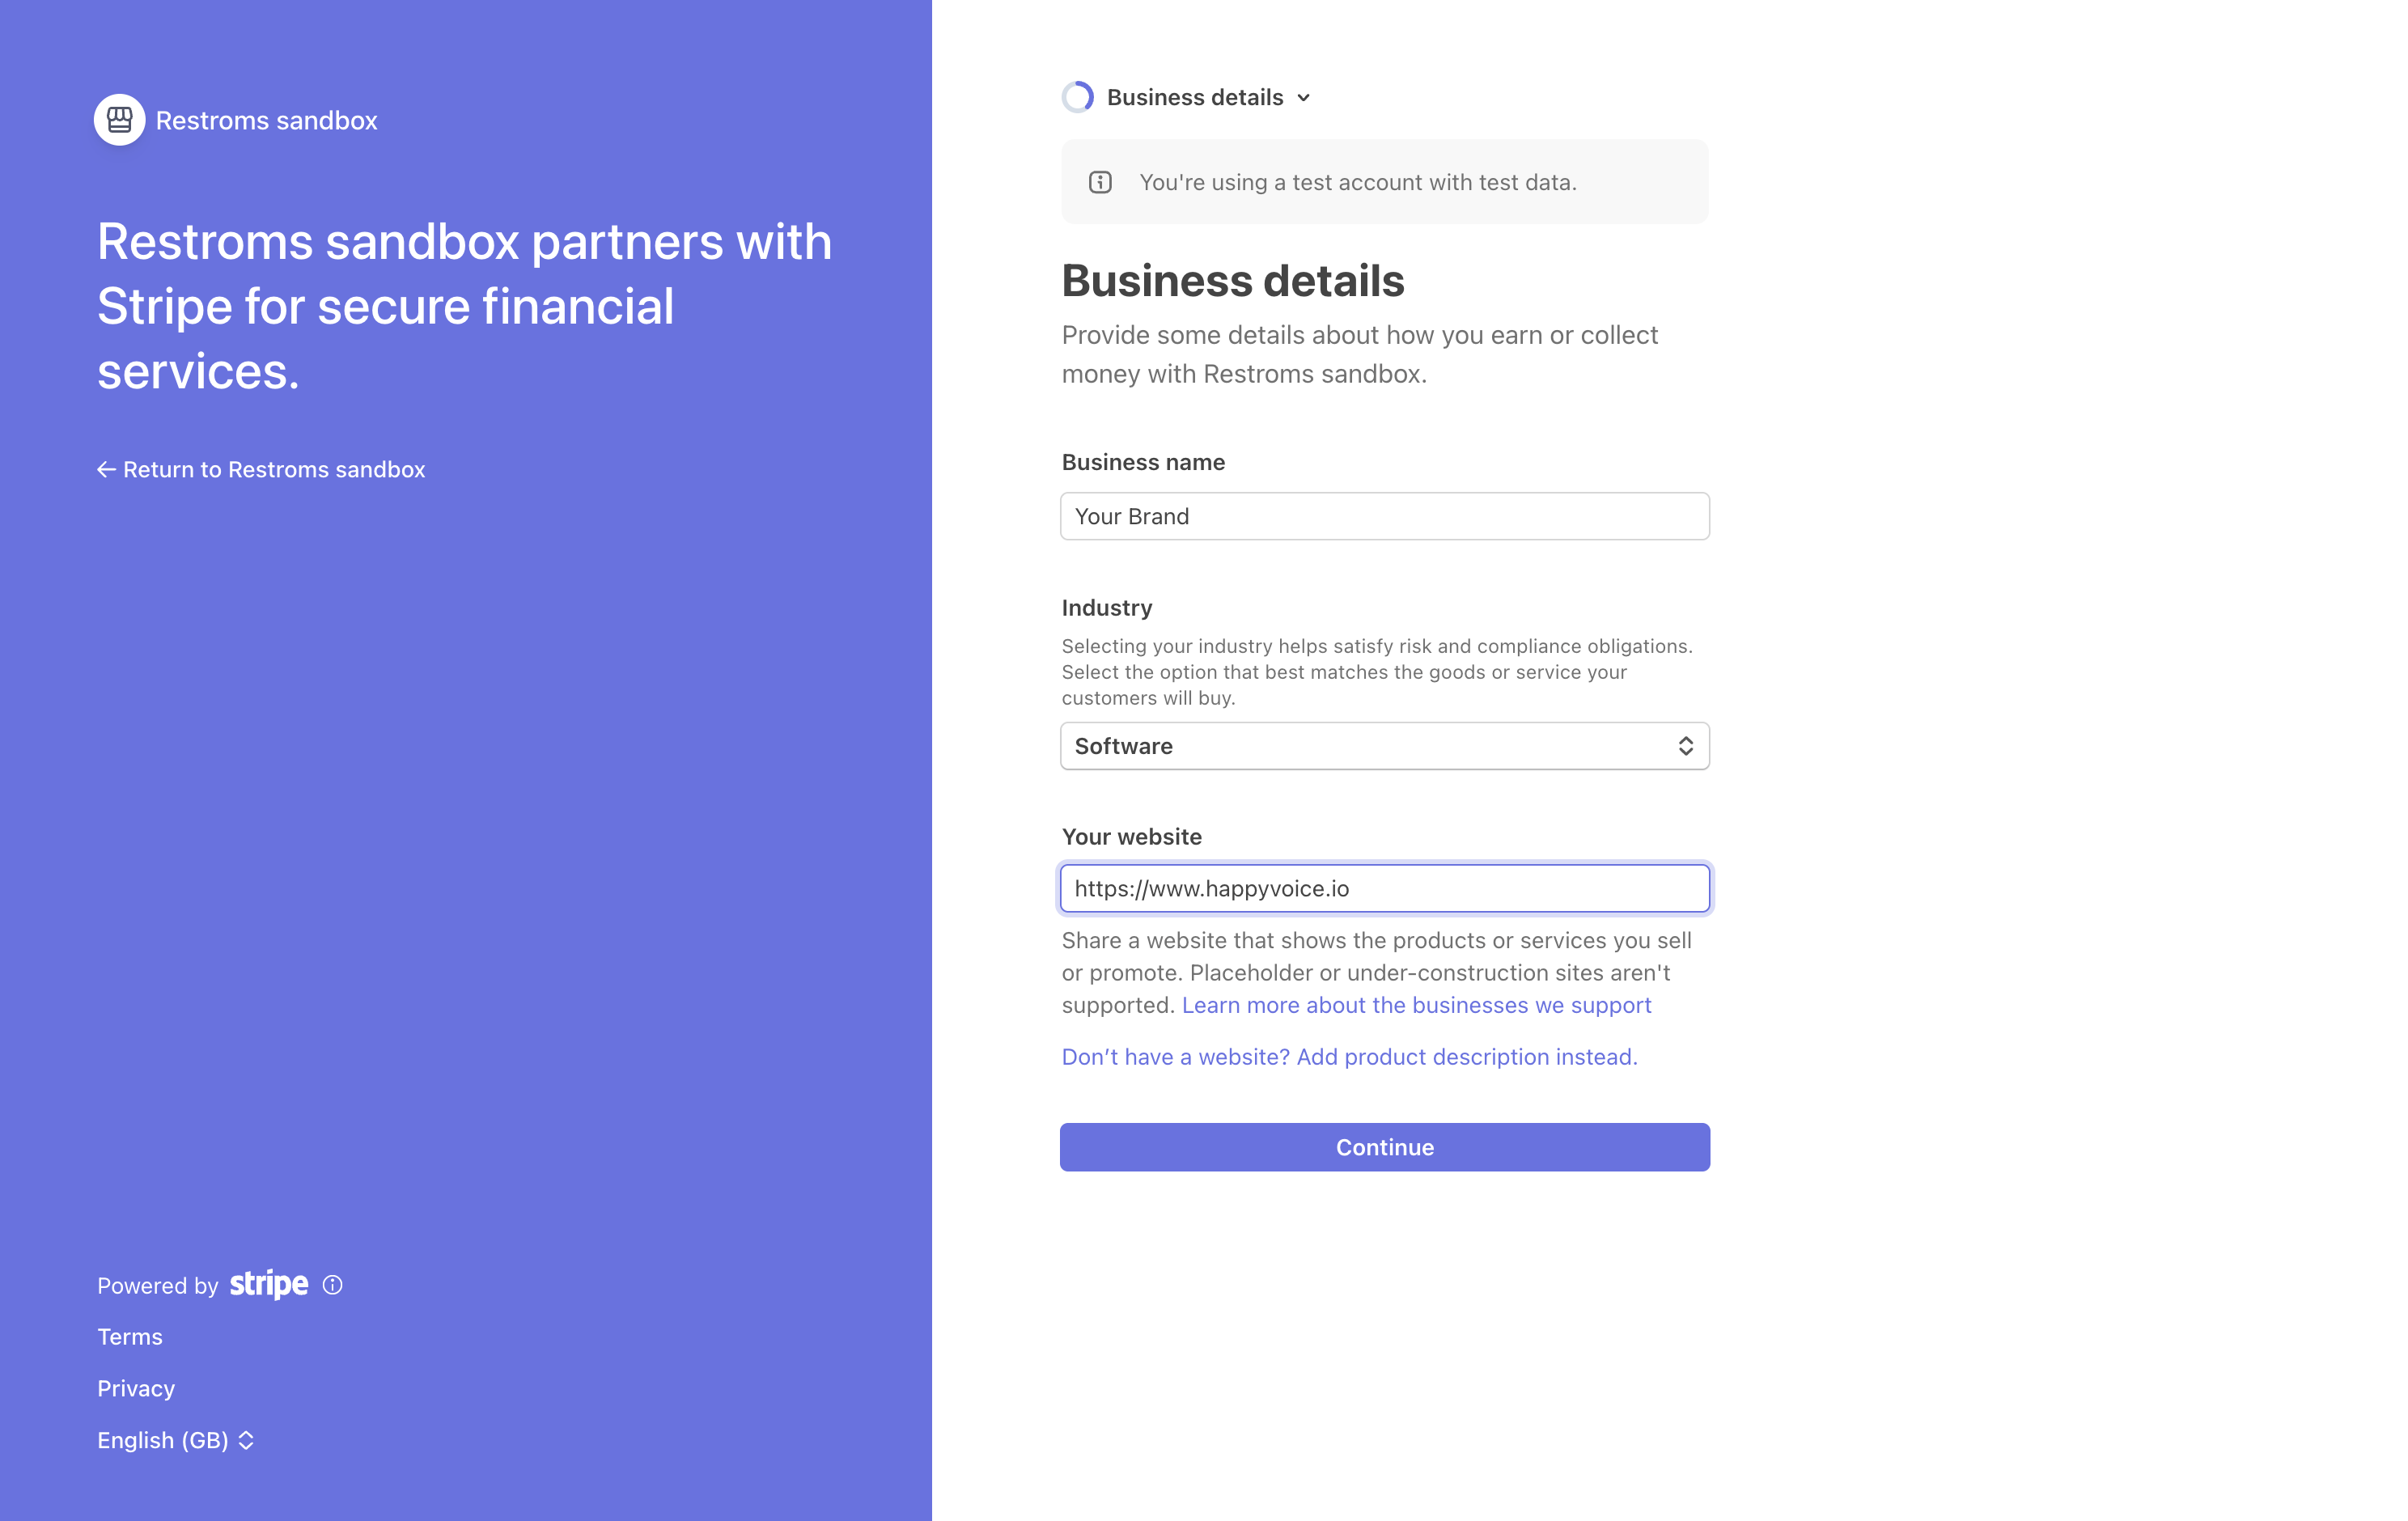
Key Fields & Instructions
| Field | Value | Notes |
|---|---|---|
| Industry | Software → Computer software or Consulting | Select the category that best matches your SaaS / agency offerings. |
| Business website | https://yourdomain.com | Enter your white-label domain or agency homepage. |
| Product description | (Optional) | Brief explanation of your AI voice receptionist platform. |
Press Continue to proceed to the payout accounts selection.
Step 4: Select an Account for Payouts
Stripe enables automated direct deposits for all subscription payments your restaurants make to you.
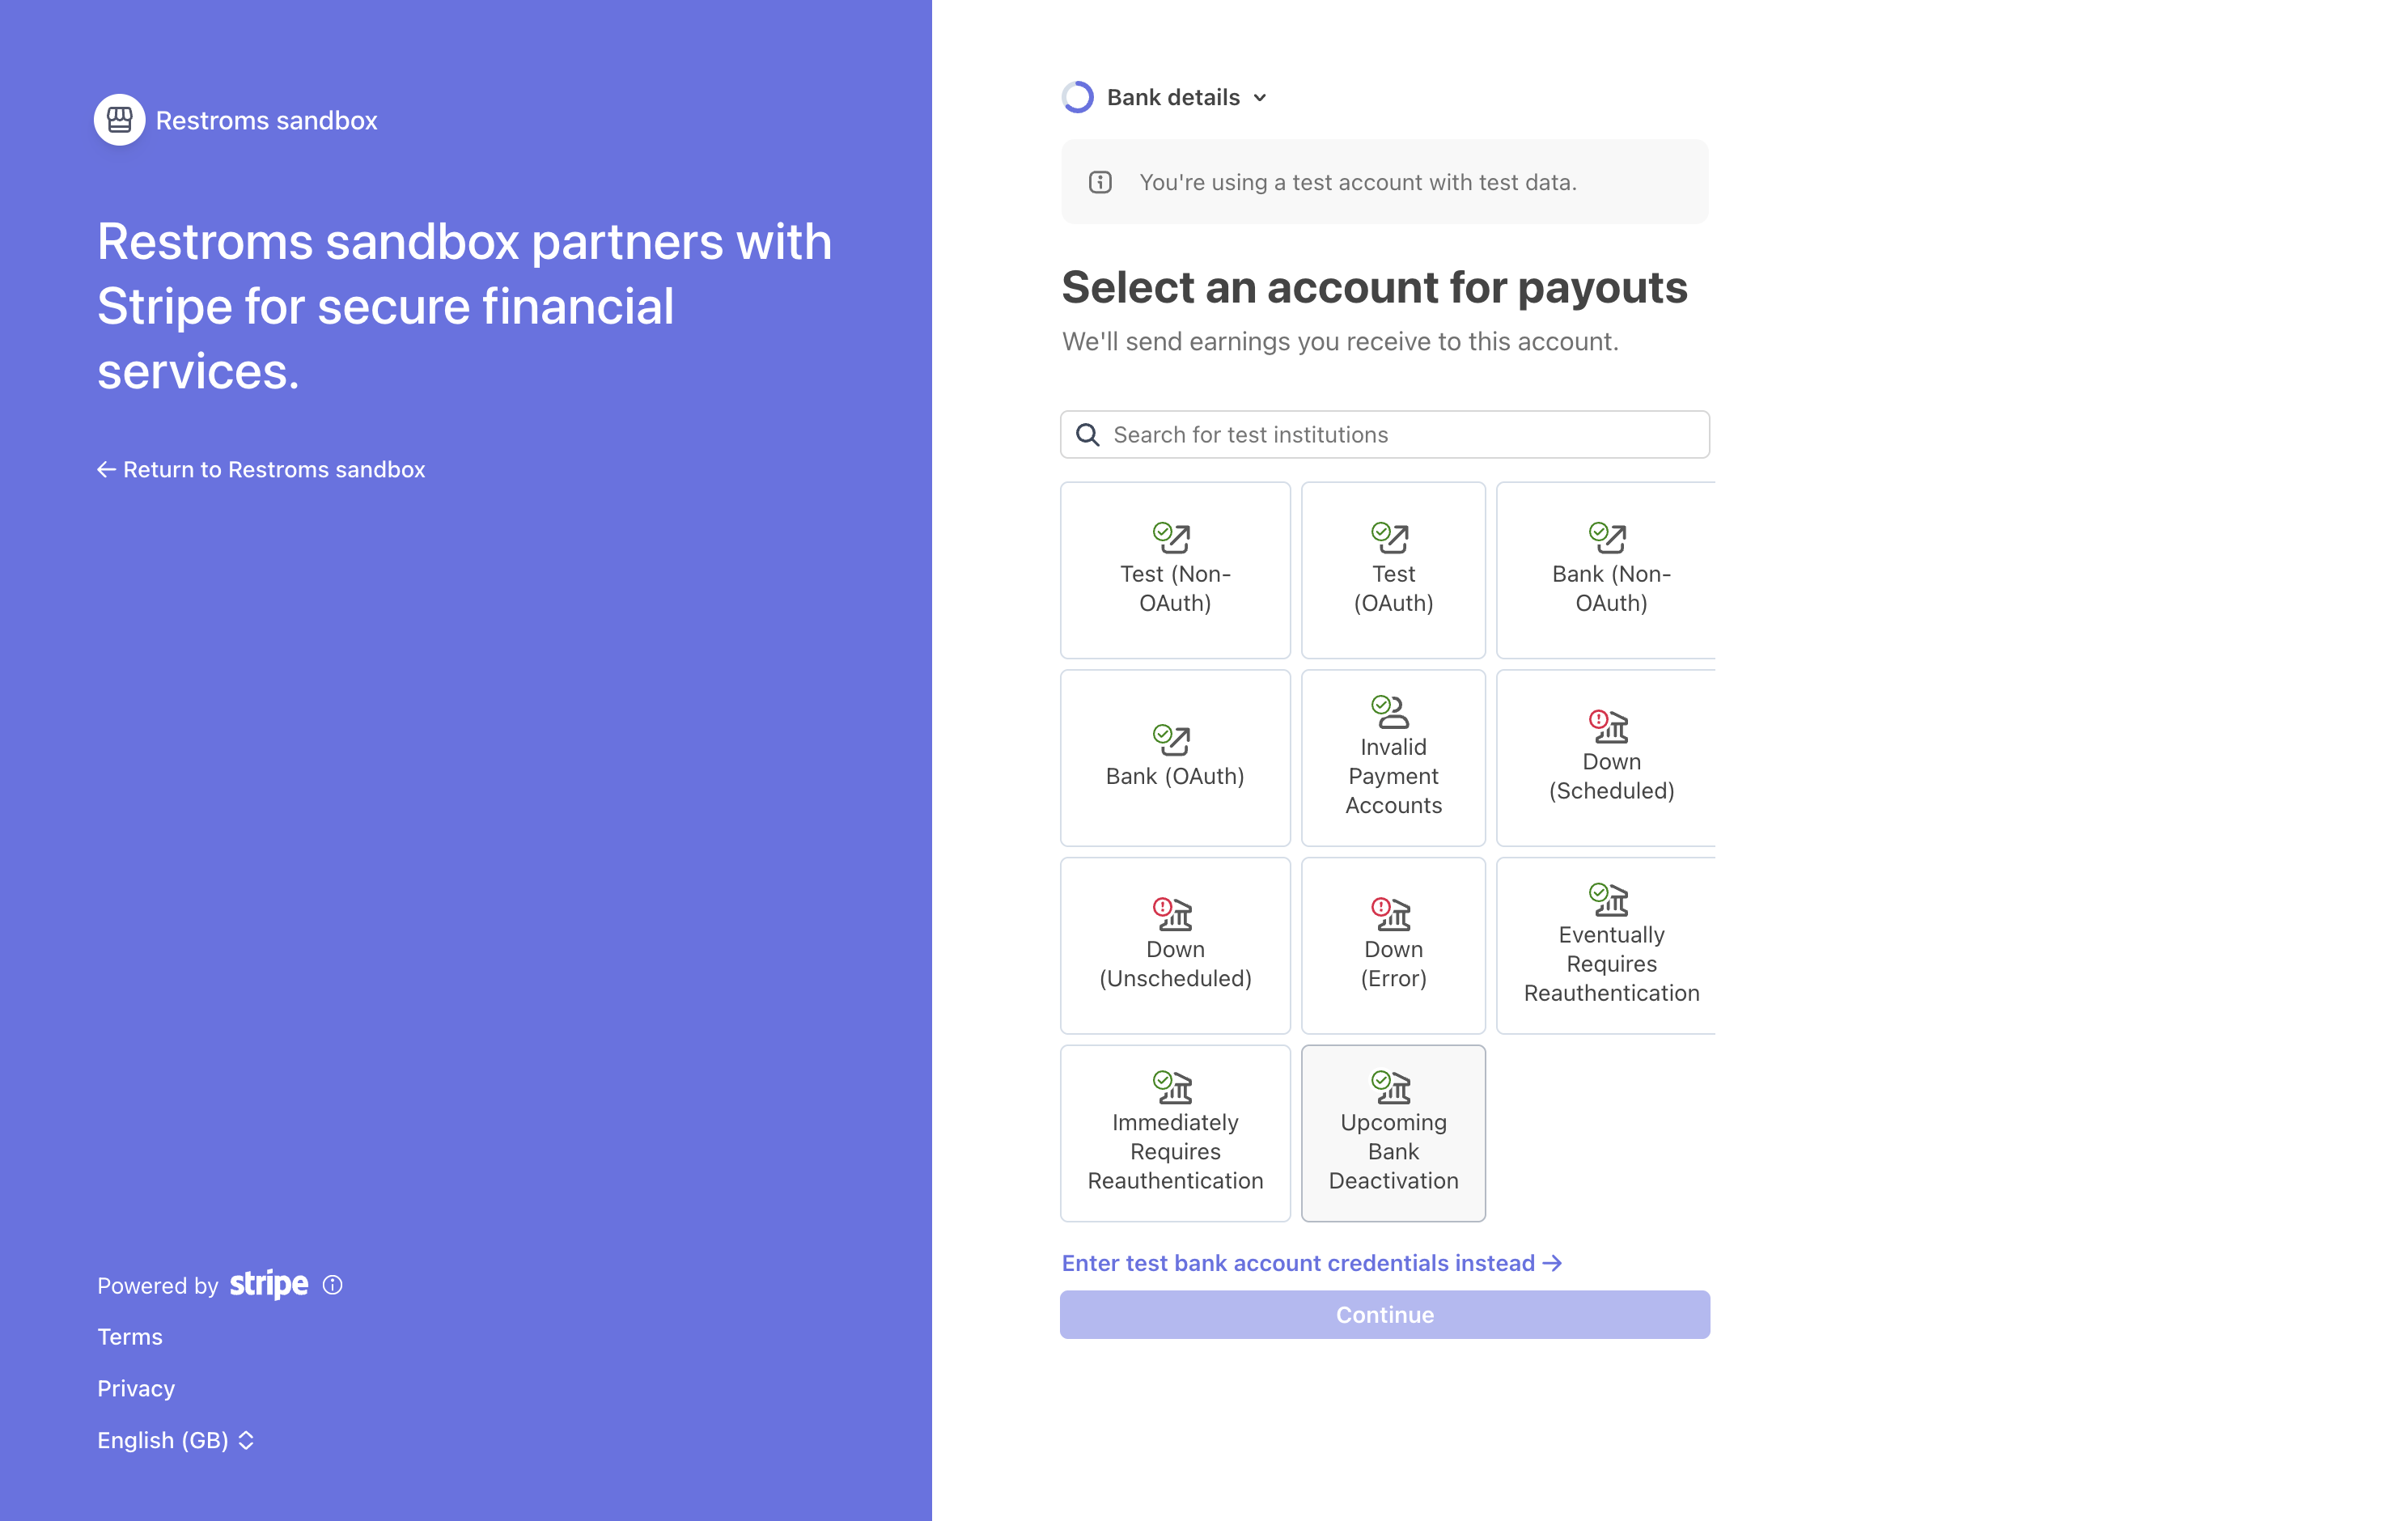
Connecting Your Bank
You can connect your bank via instant verification (Stripe Financial Connections) or by manually entering routing and account numbers.
Choose Your Financial Institution
Select your bank from the list or use the search bar. In test mode, select Test (Non-OAuth) or Test (OAuth).
Select Account & Authorize
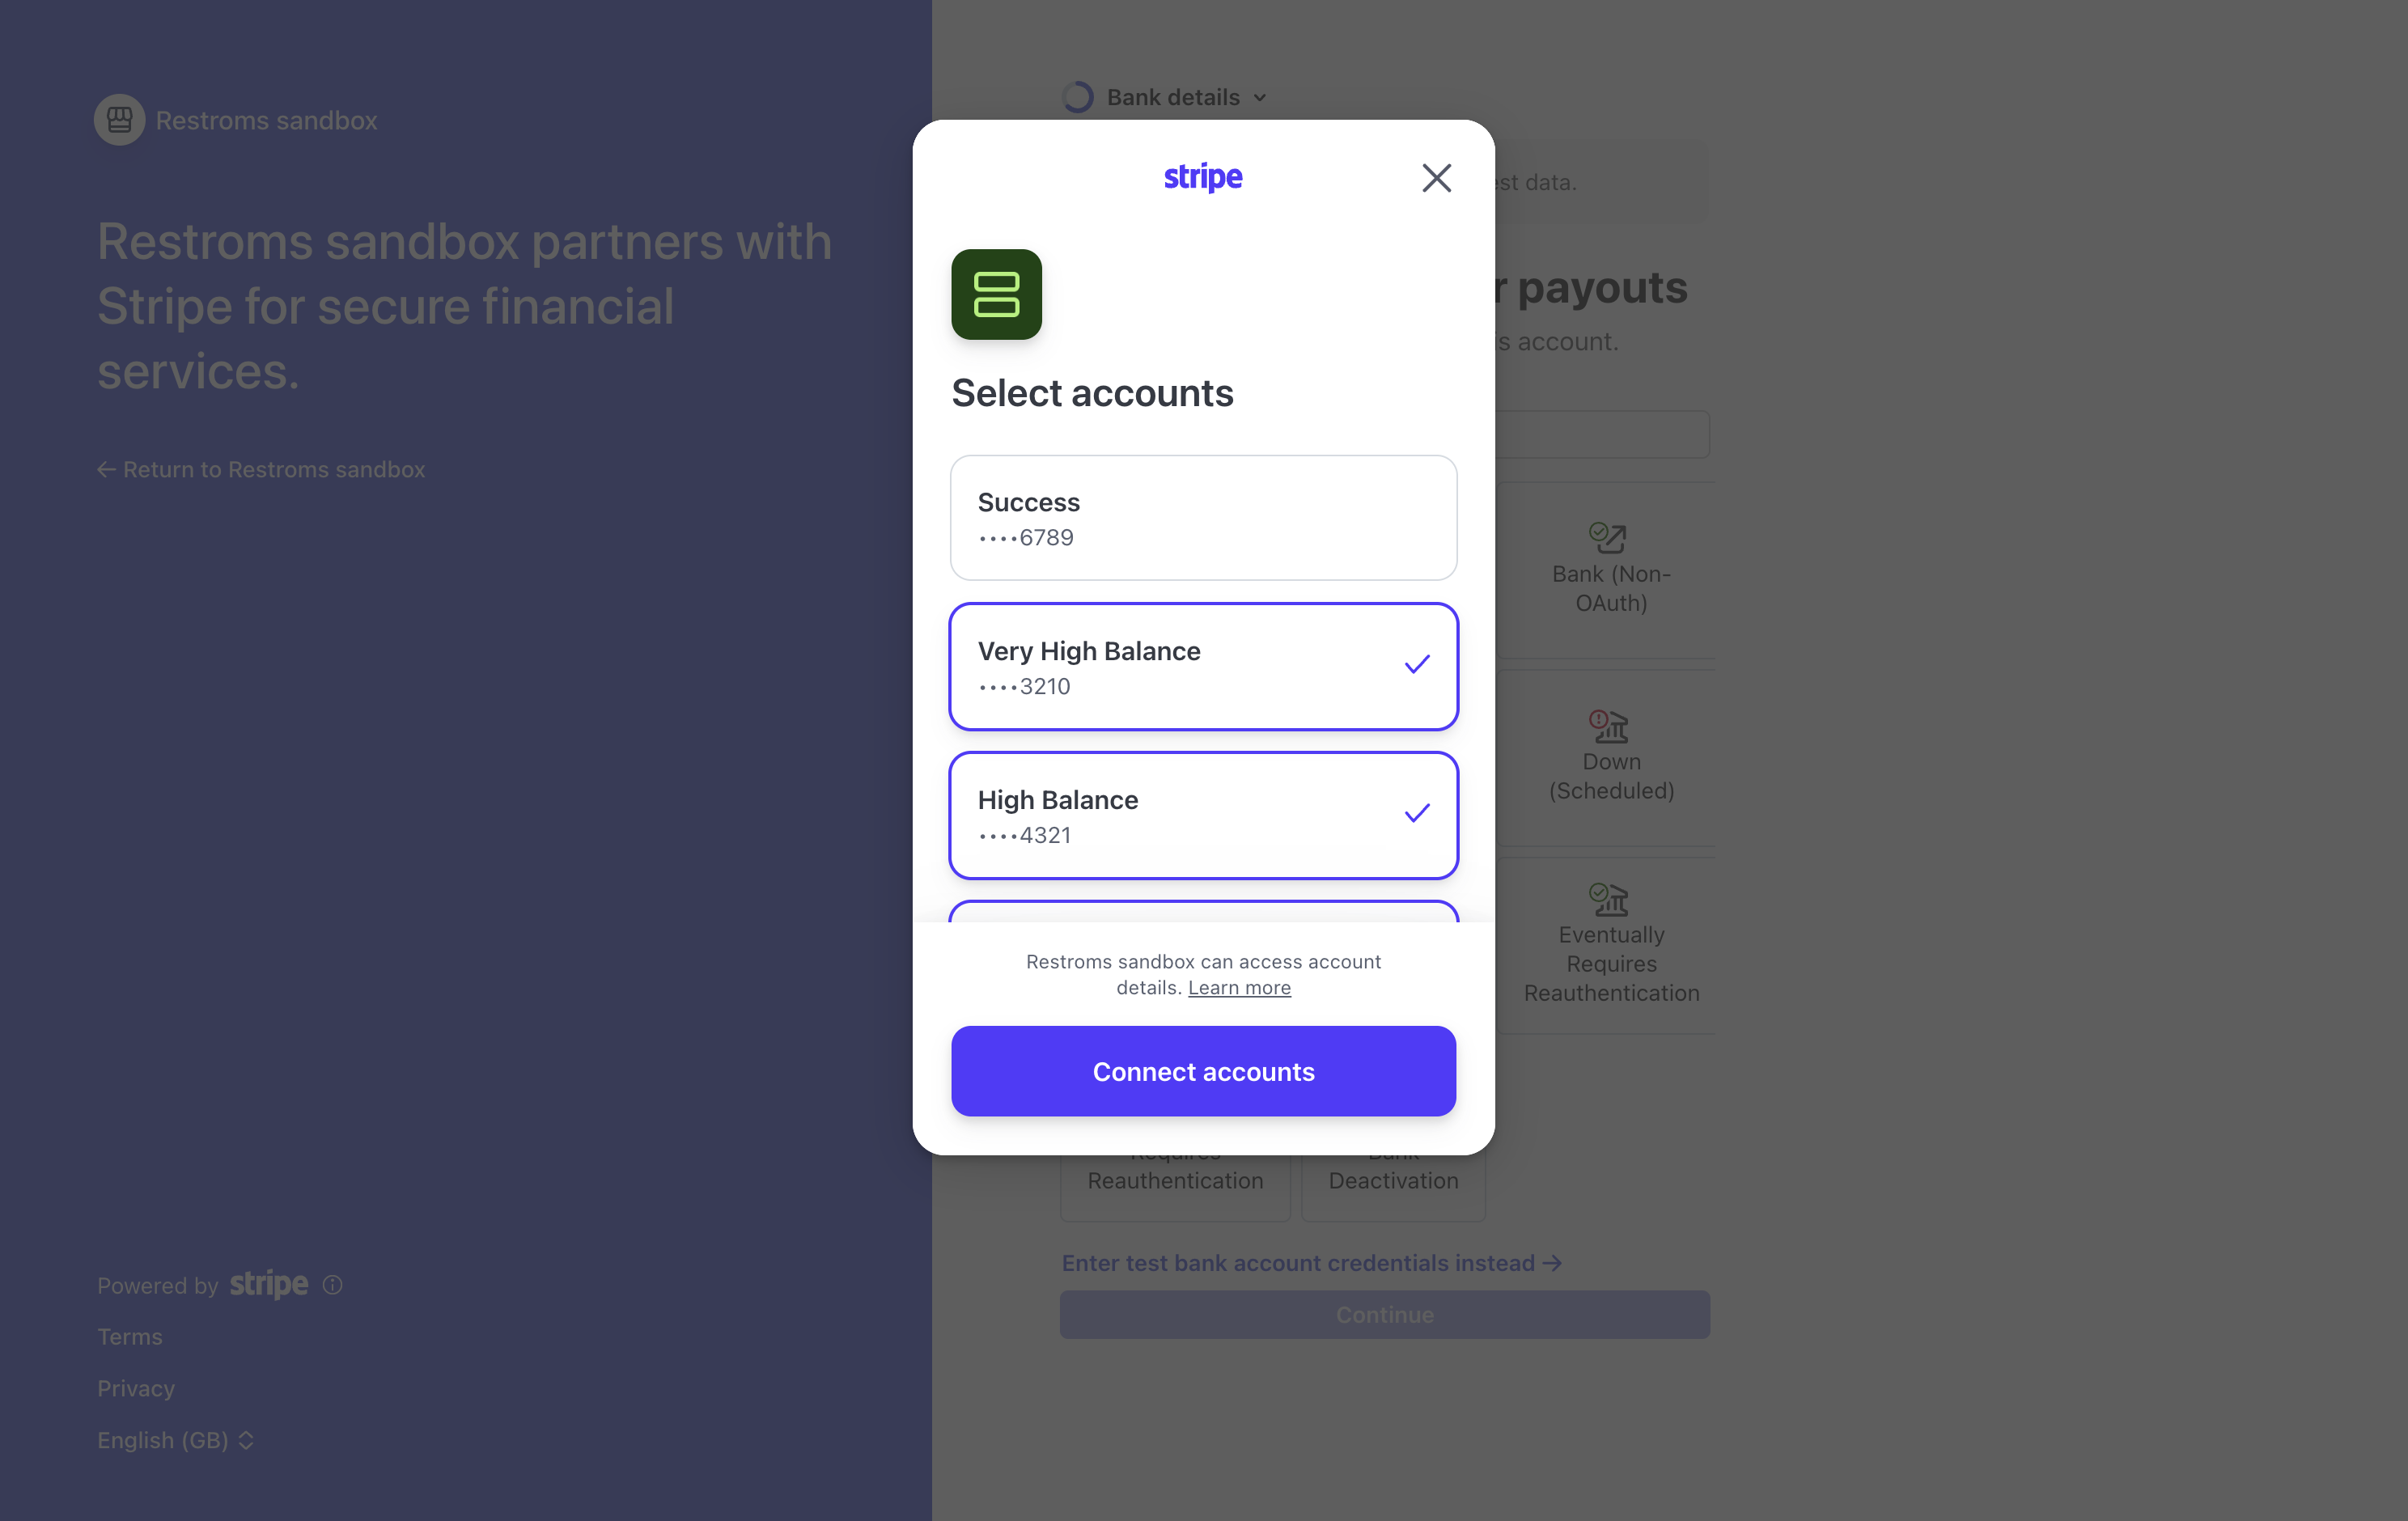
In the secure Financial Connections dialog, check the account you wish to receive payout deposits in and press Connect accounts.
Optional: Save Account with Link
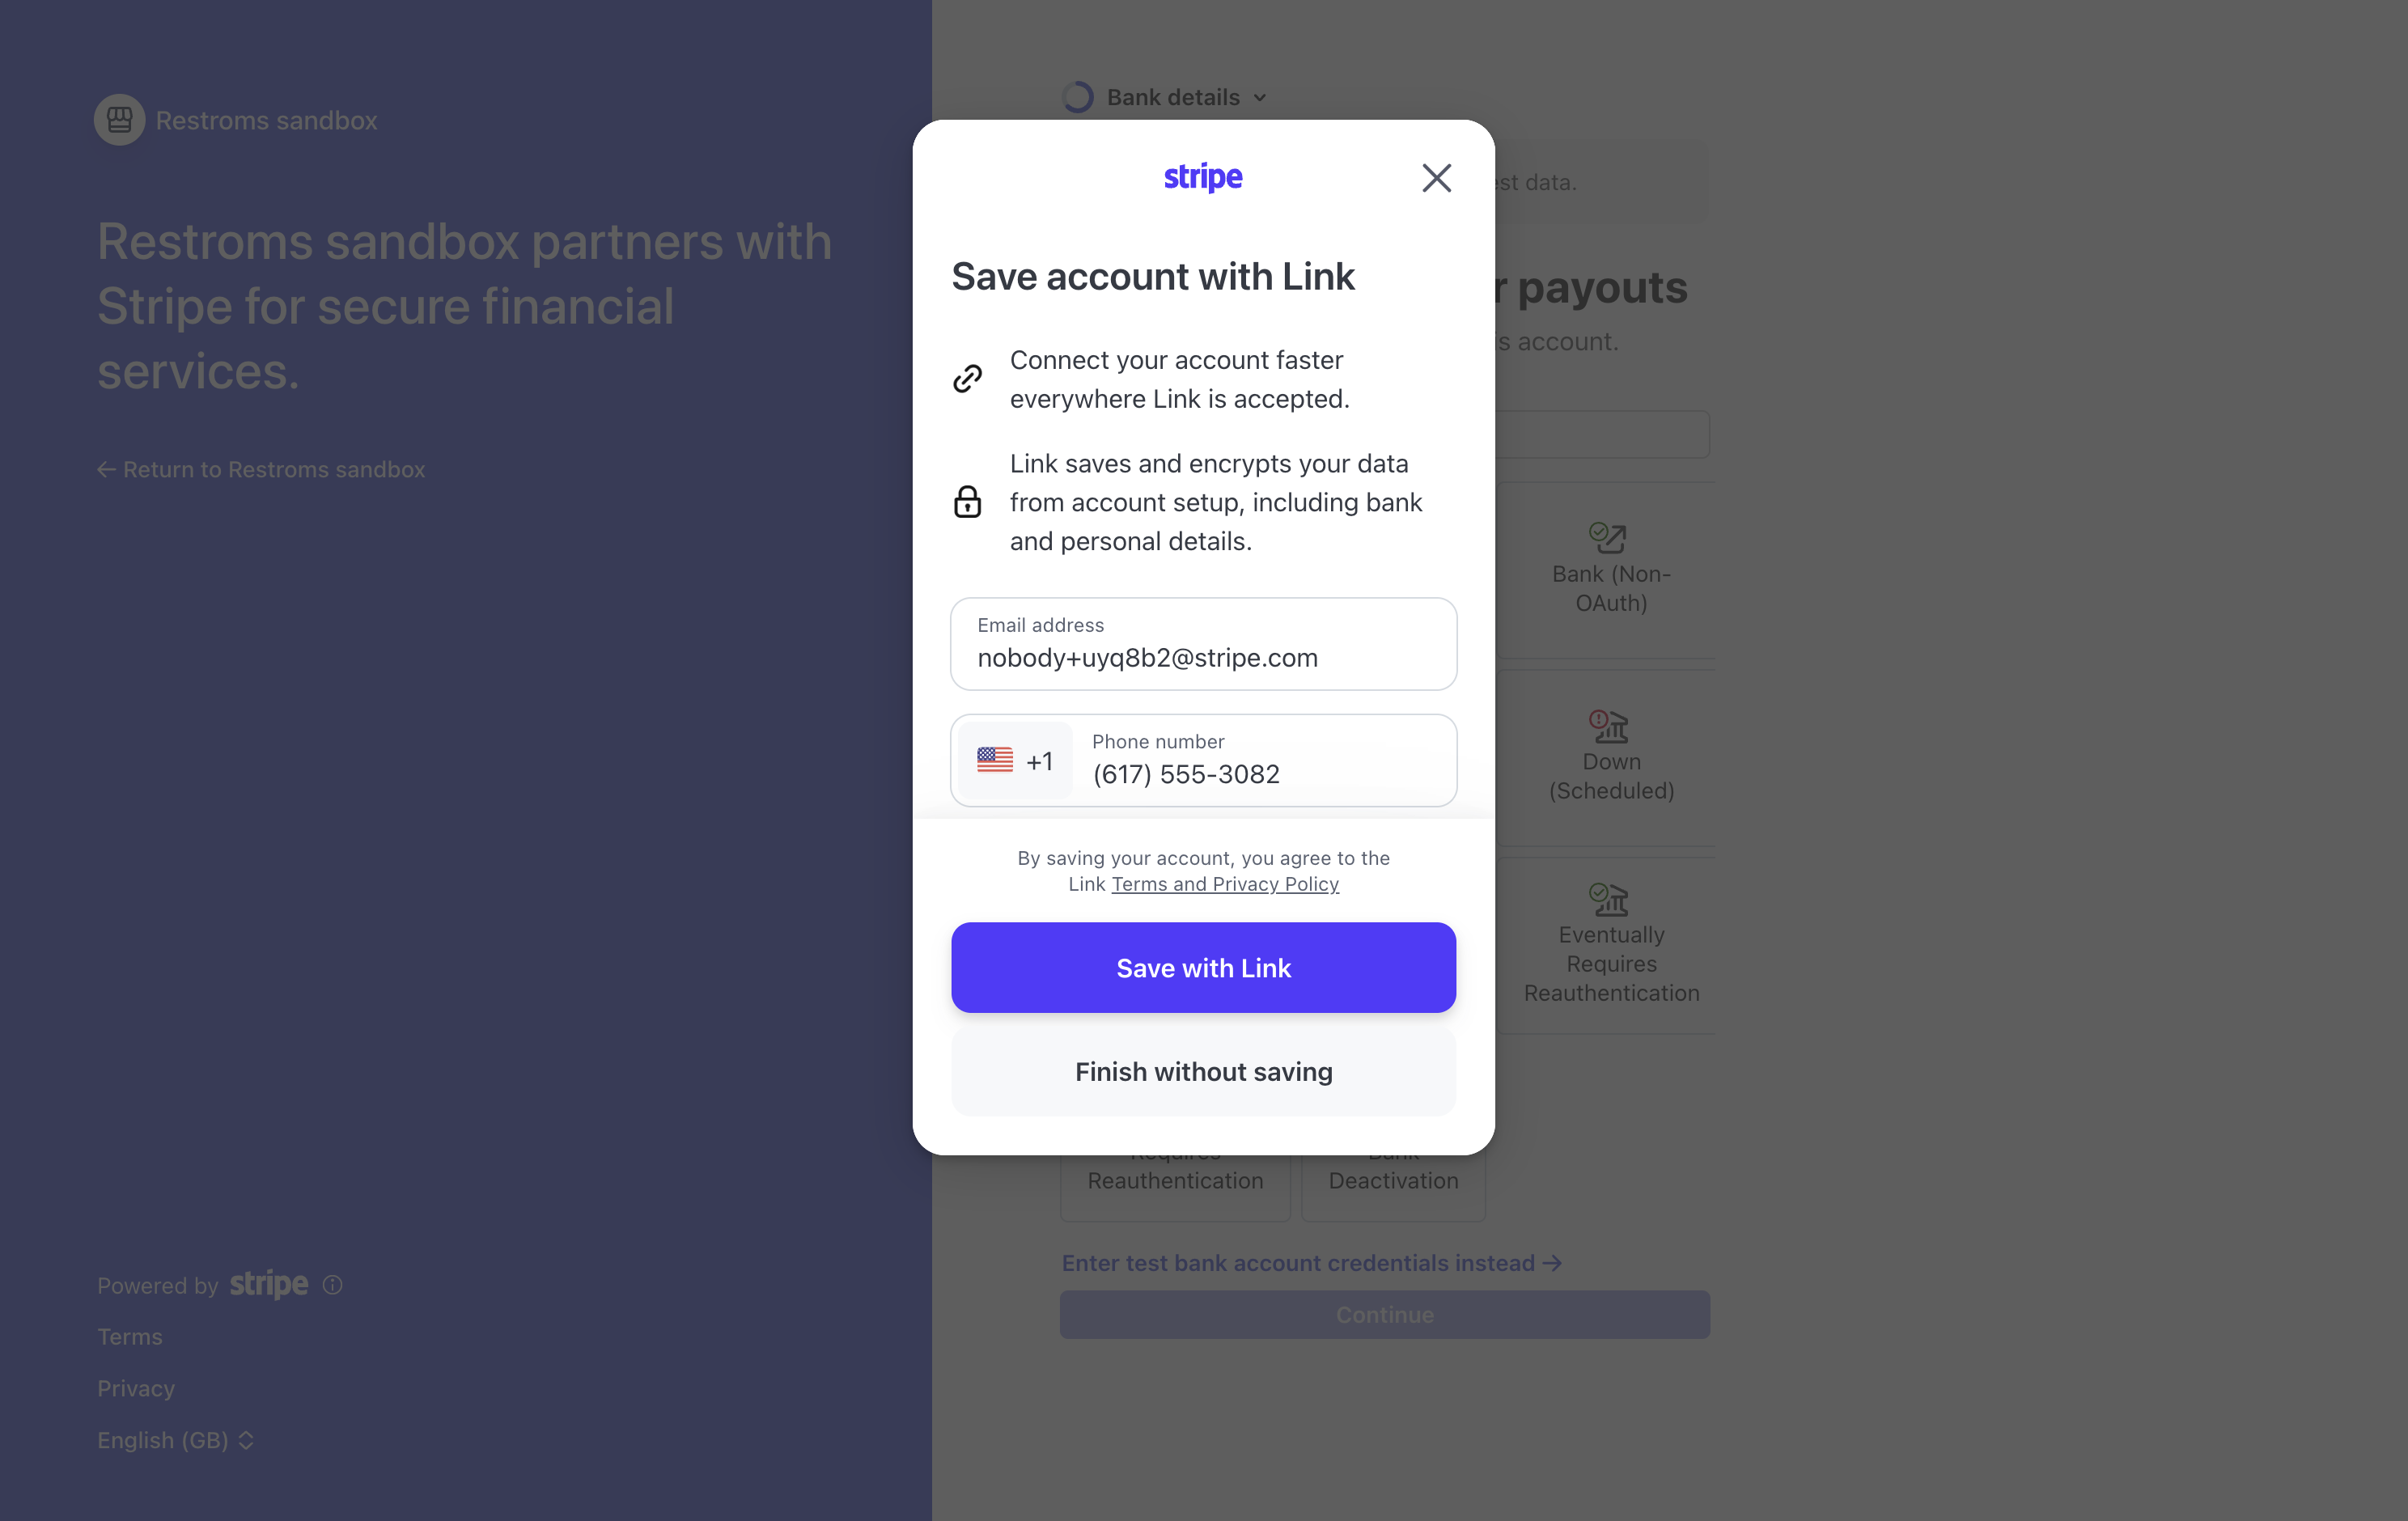
Stripe offers the option to save your payout profile with Stripe Link for 1-click verification across Stripe services. You can select Save with Link or Finish without saving.
Success Confirmation & Selection
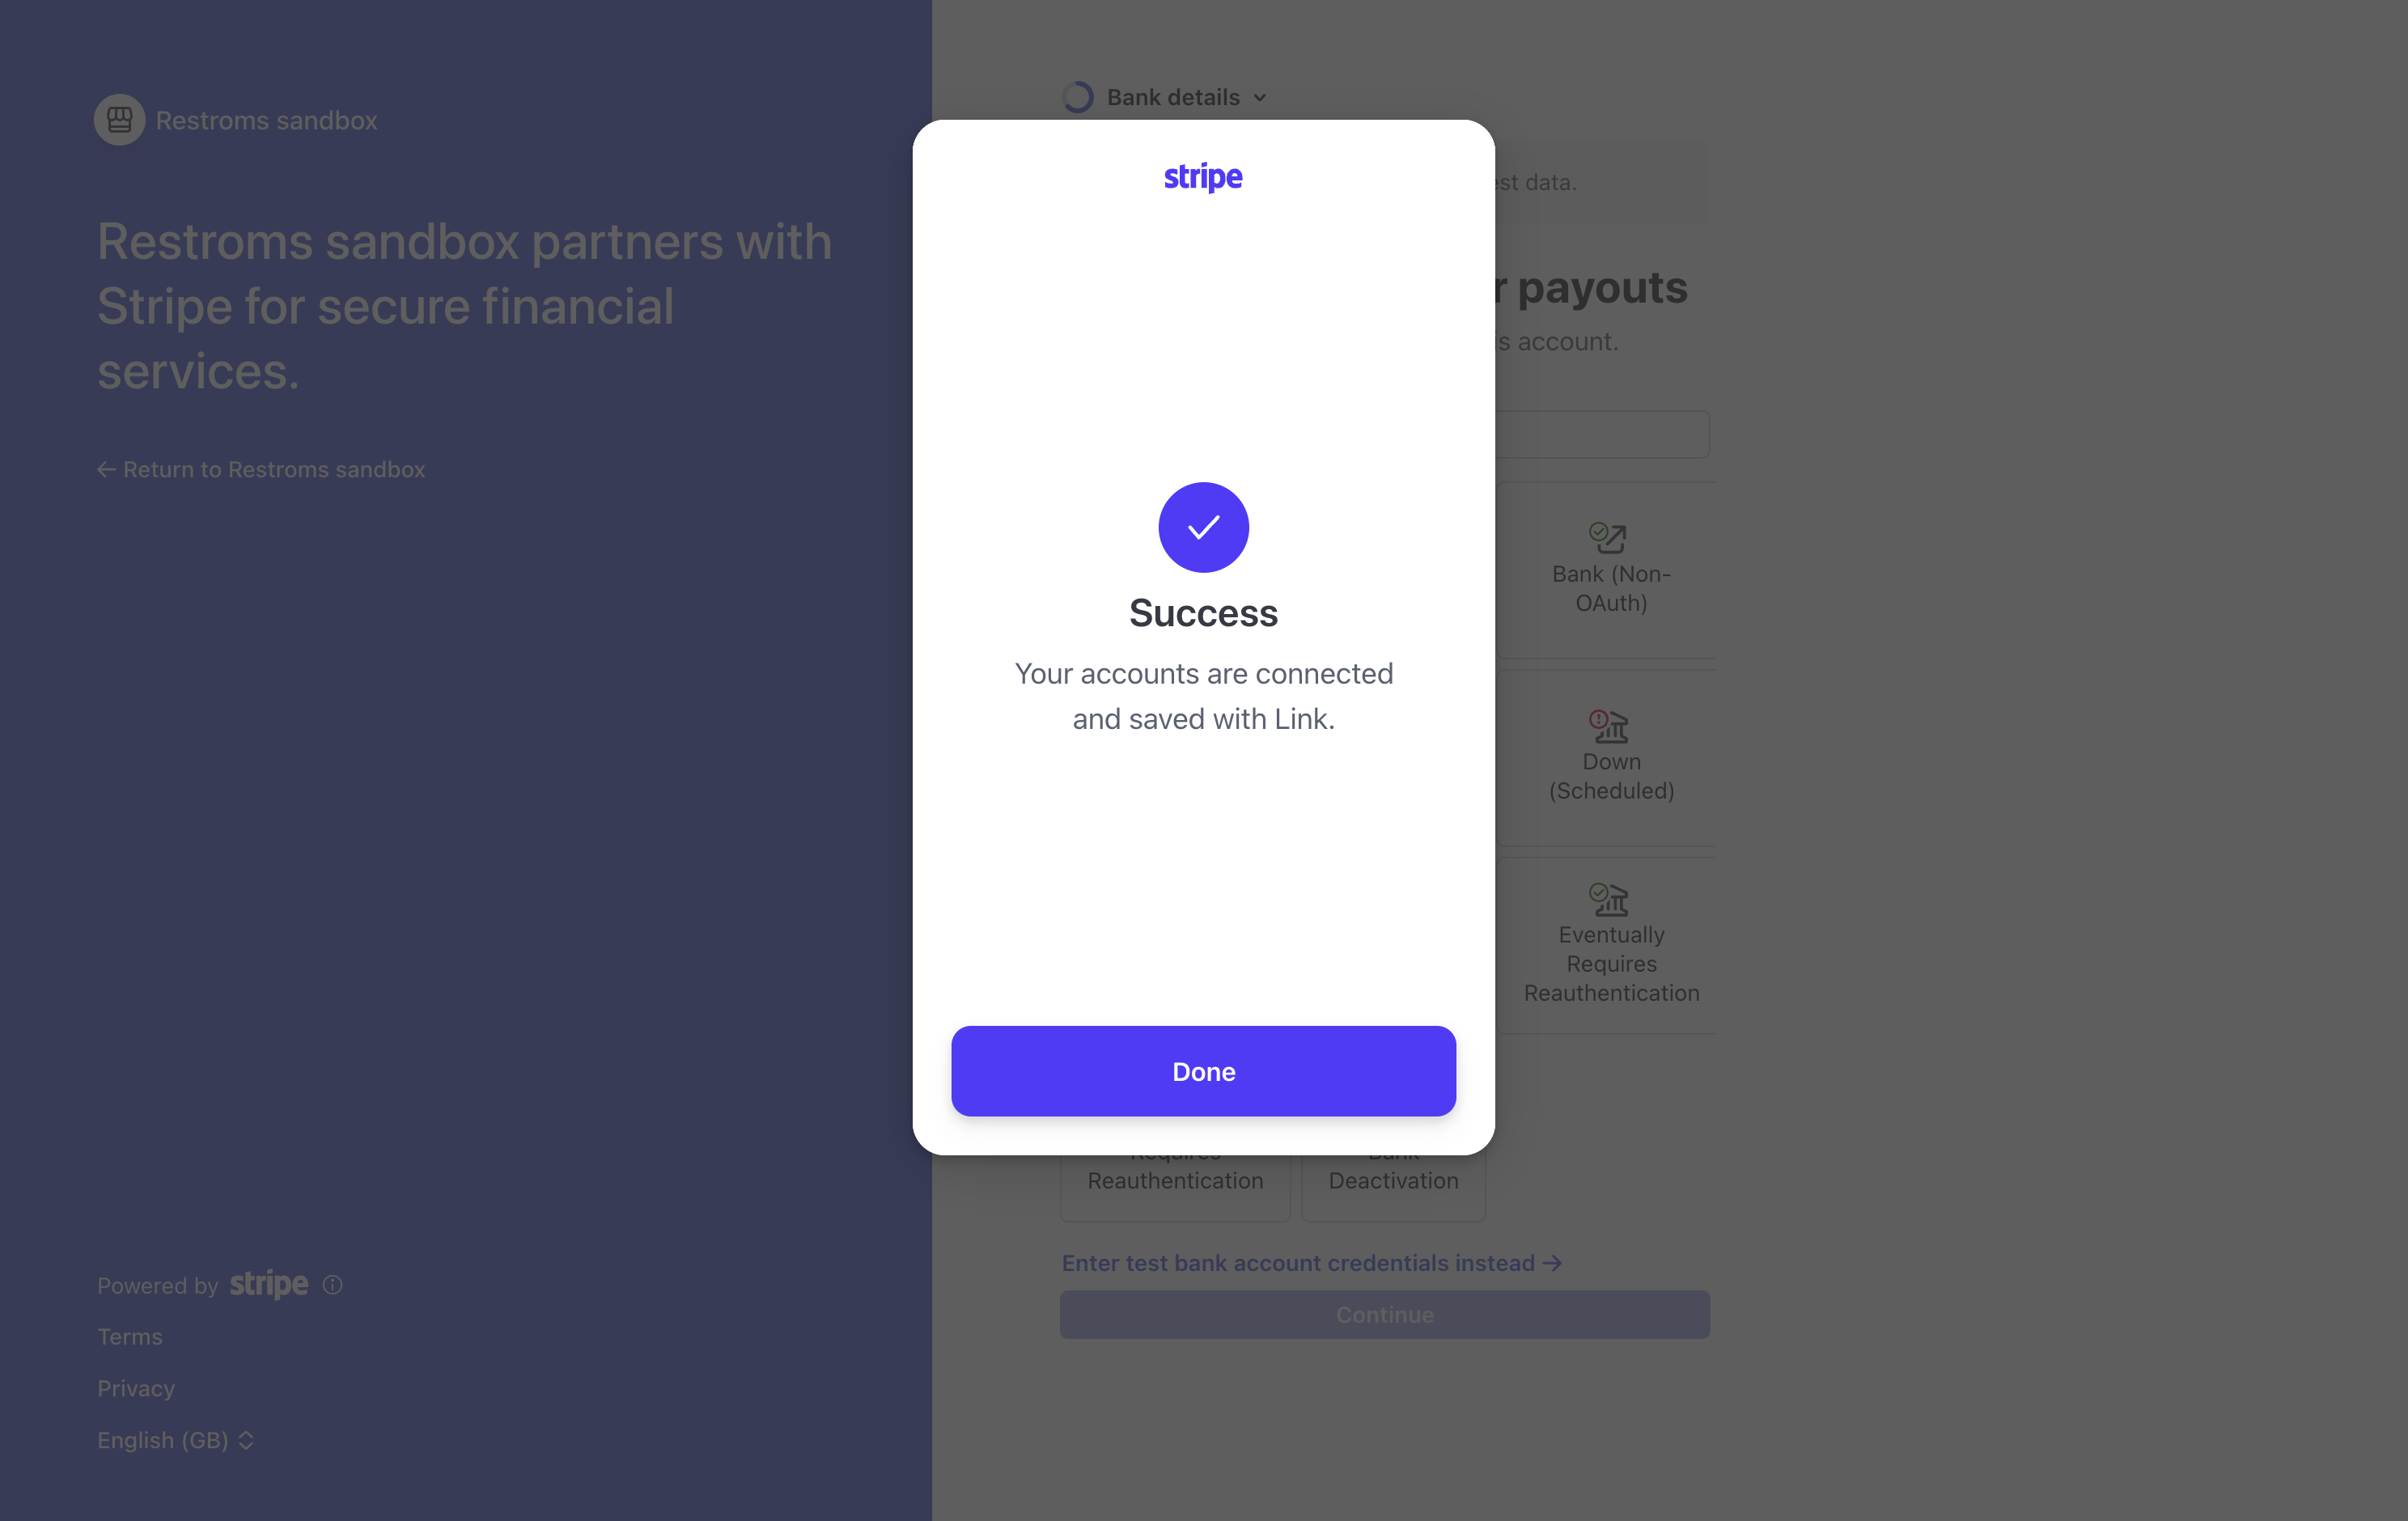
Once connected, you will see a green success checkmark. Press Done to return to the payout accounts list.
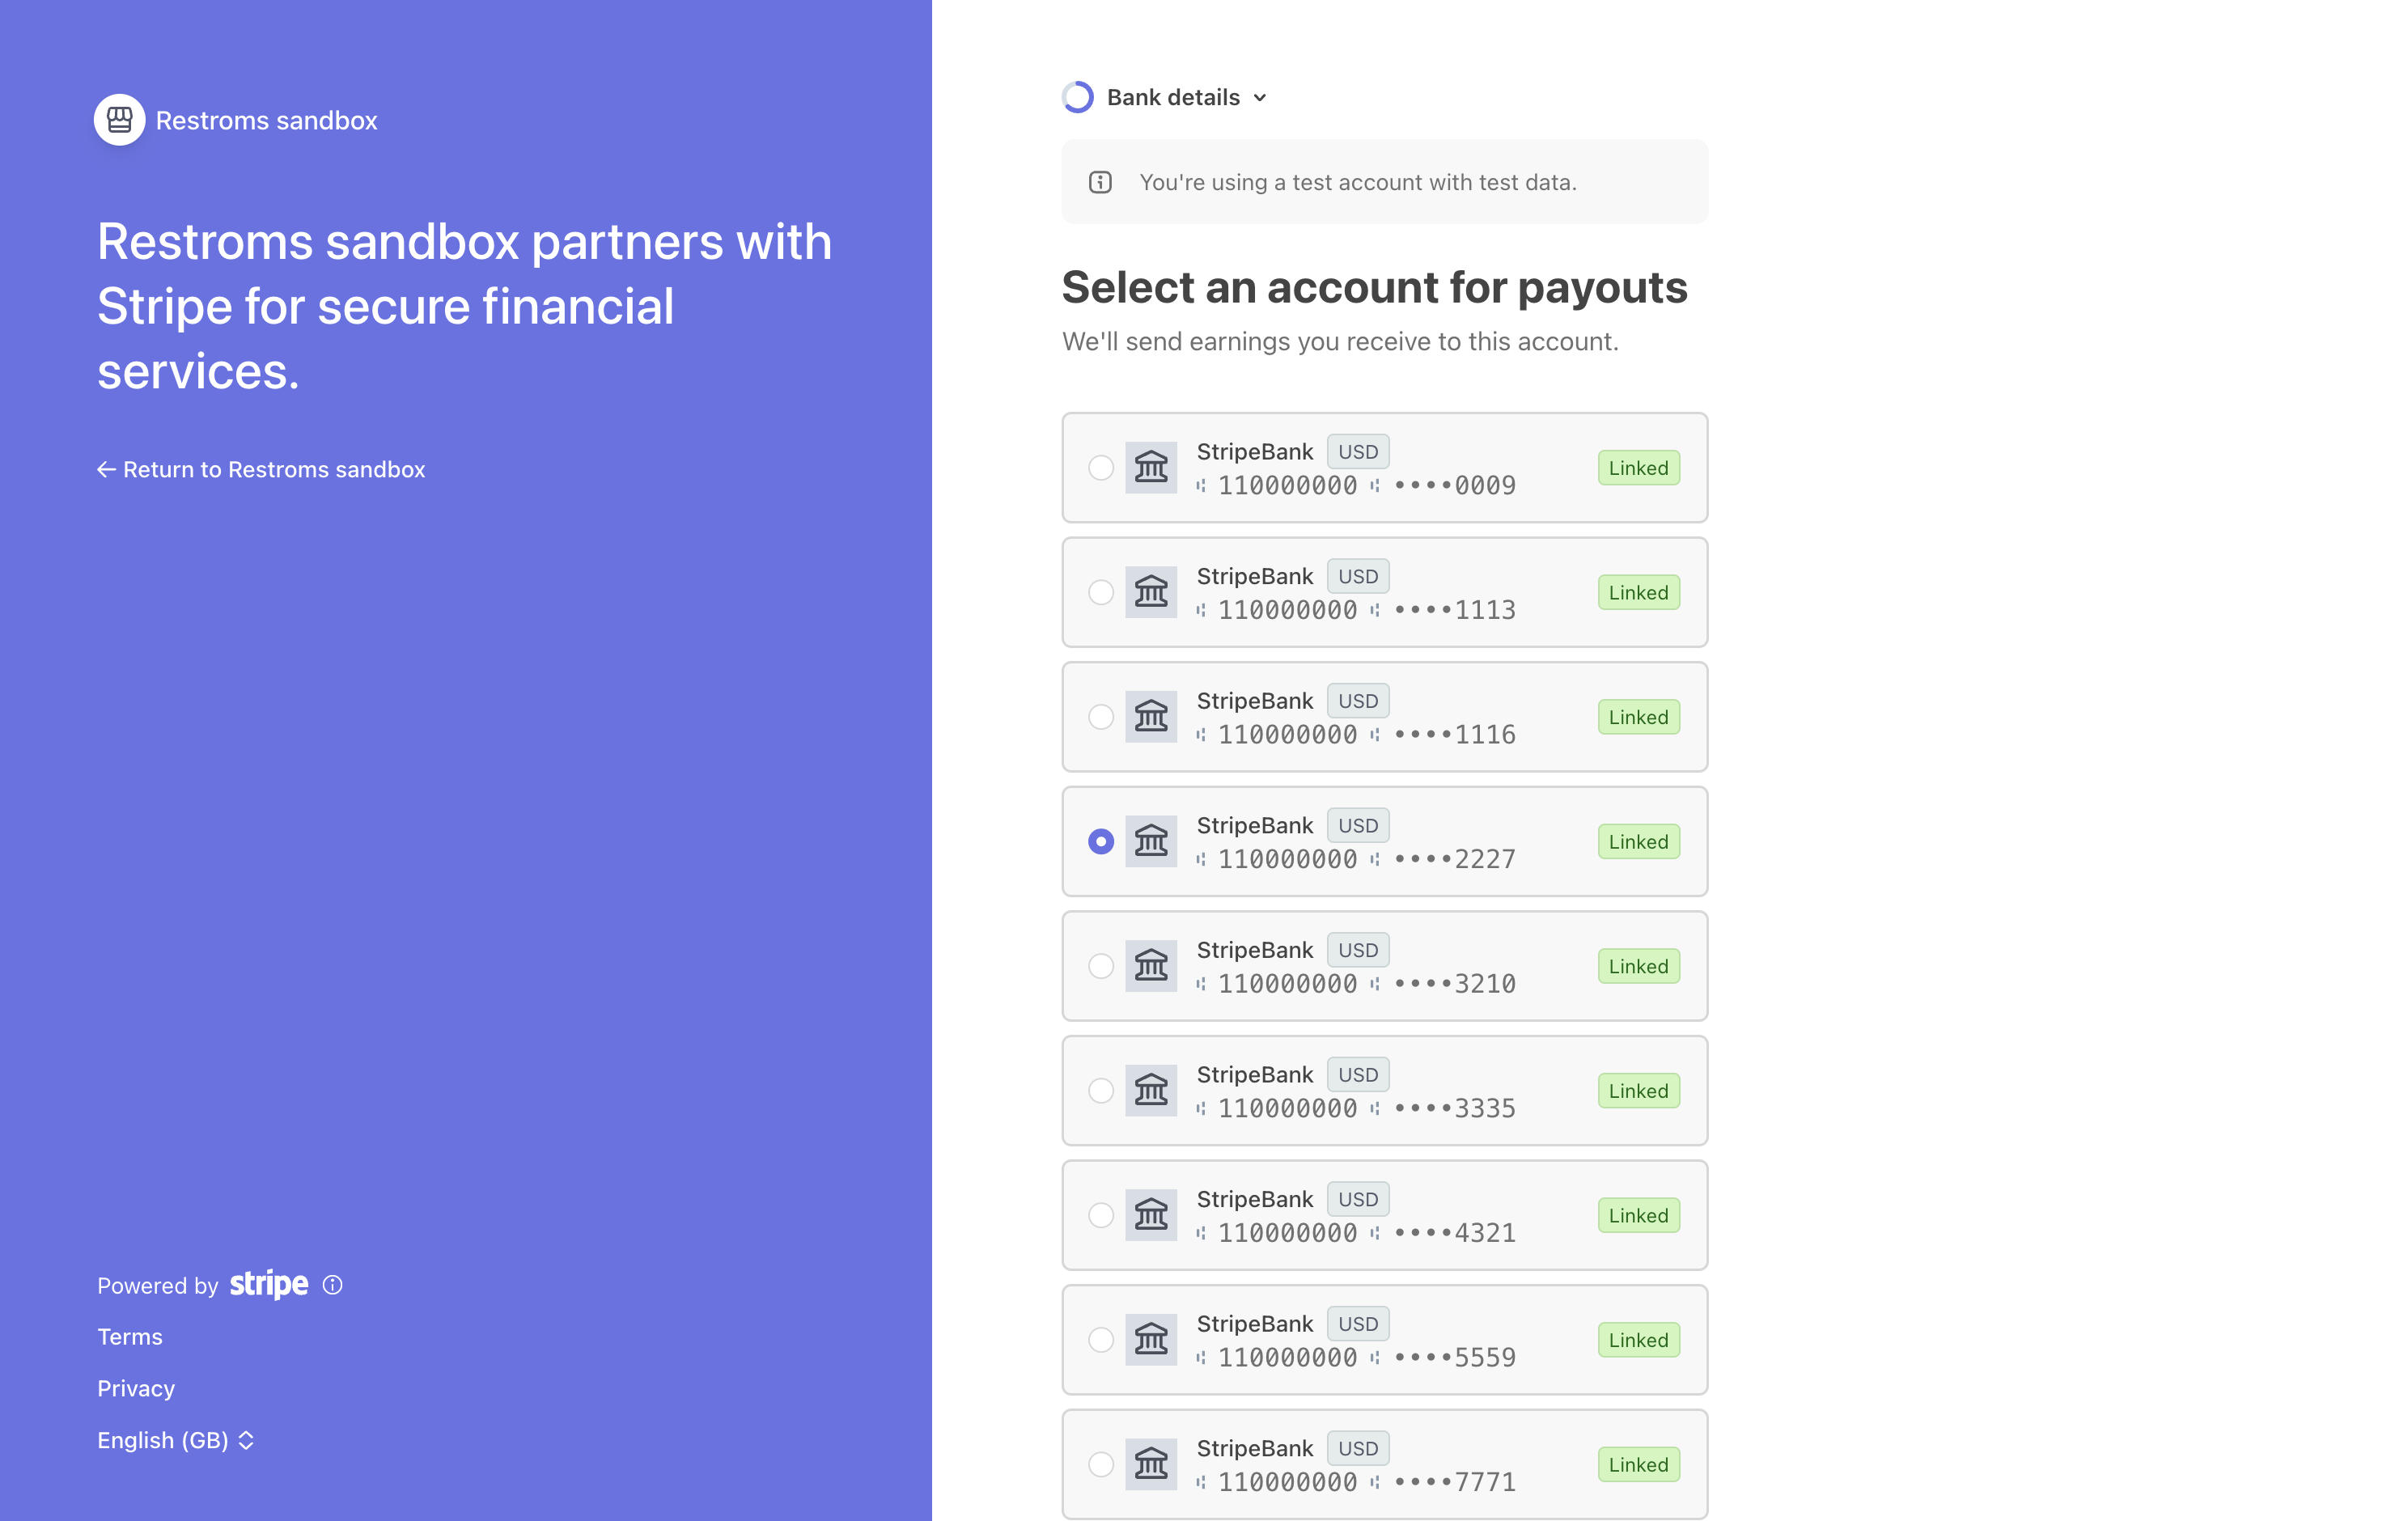
Your connected bank will now appear with a Linked badge. Select the radio button and press Continue.
Step 5: Review and Submit
The final screen provides a complete summary of all information you have supplied during onboarding.
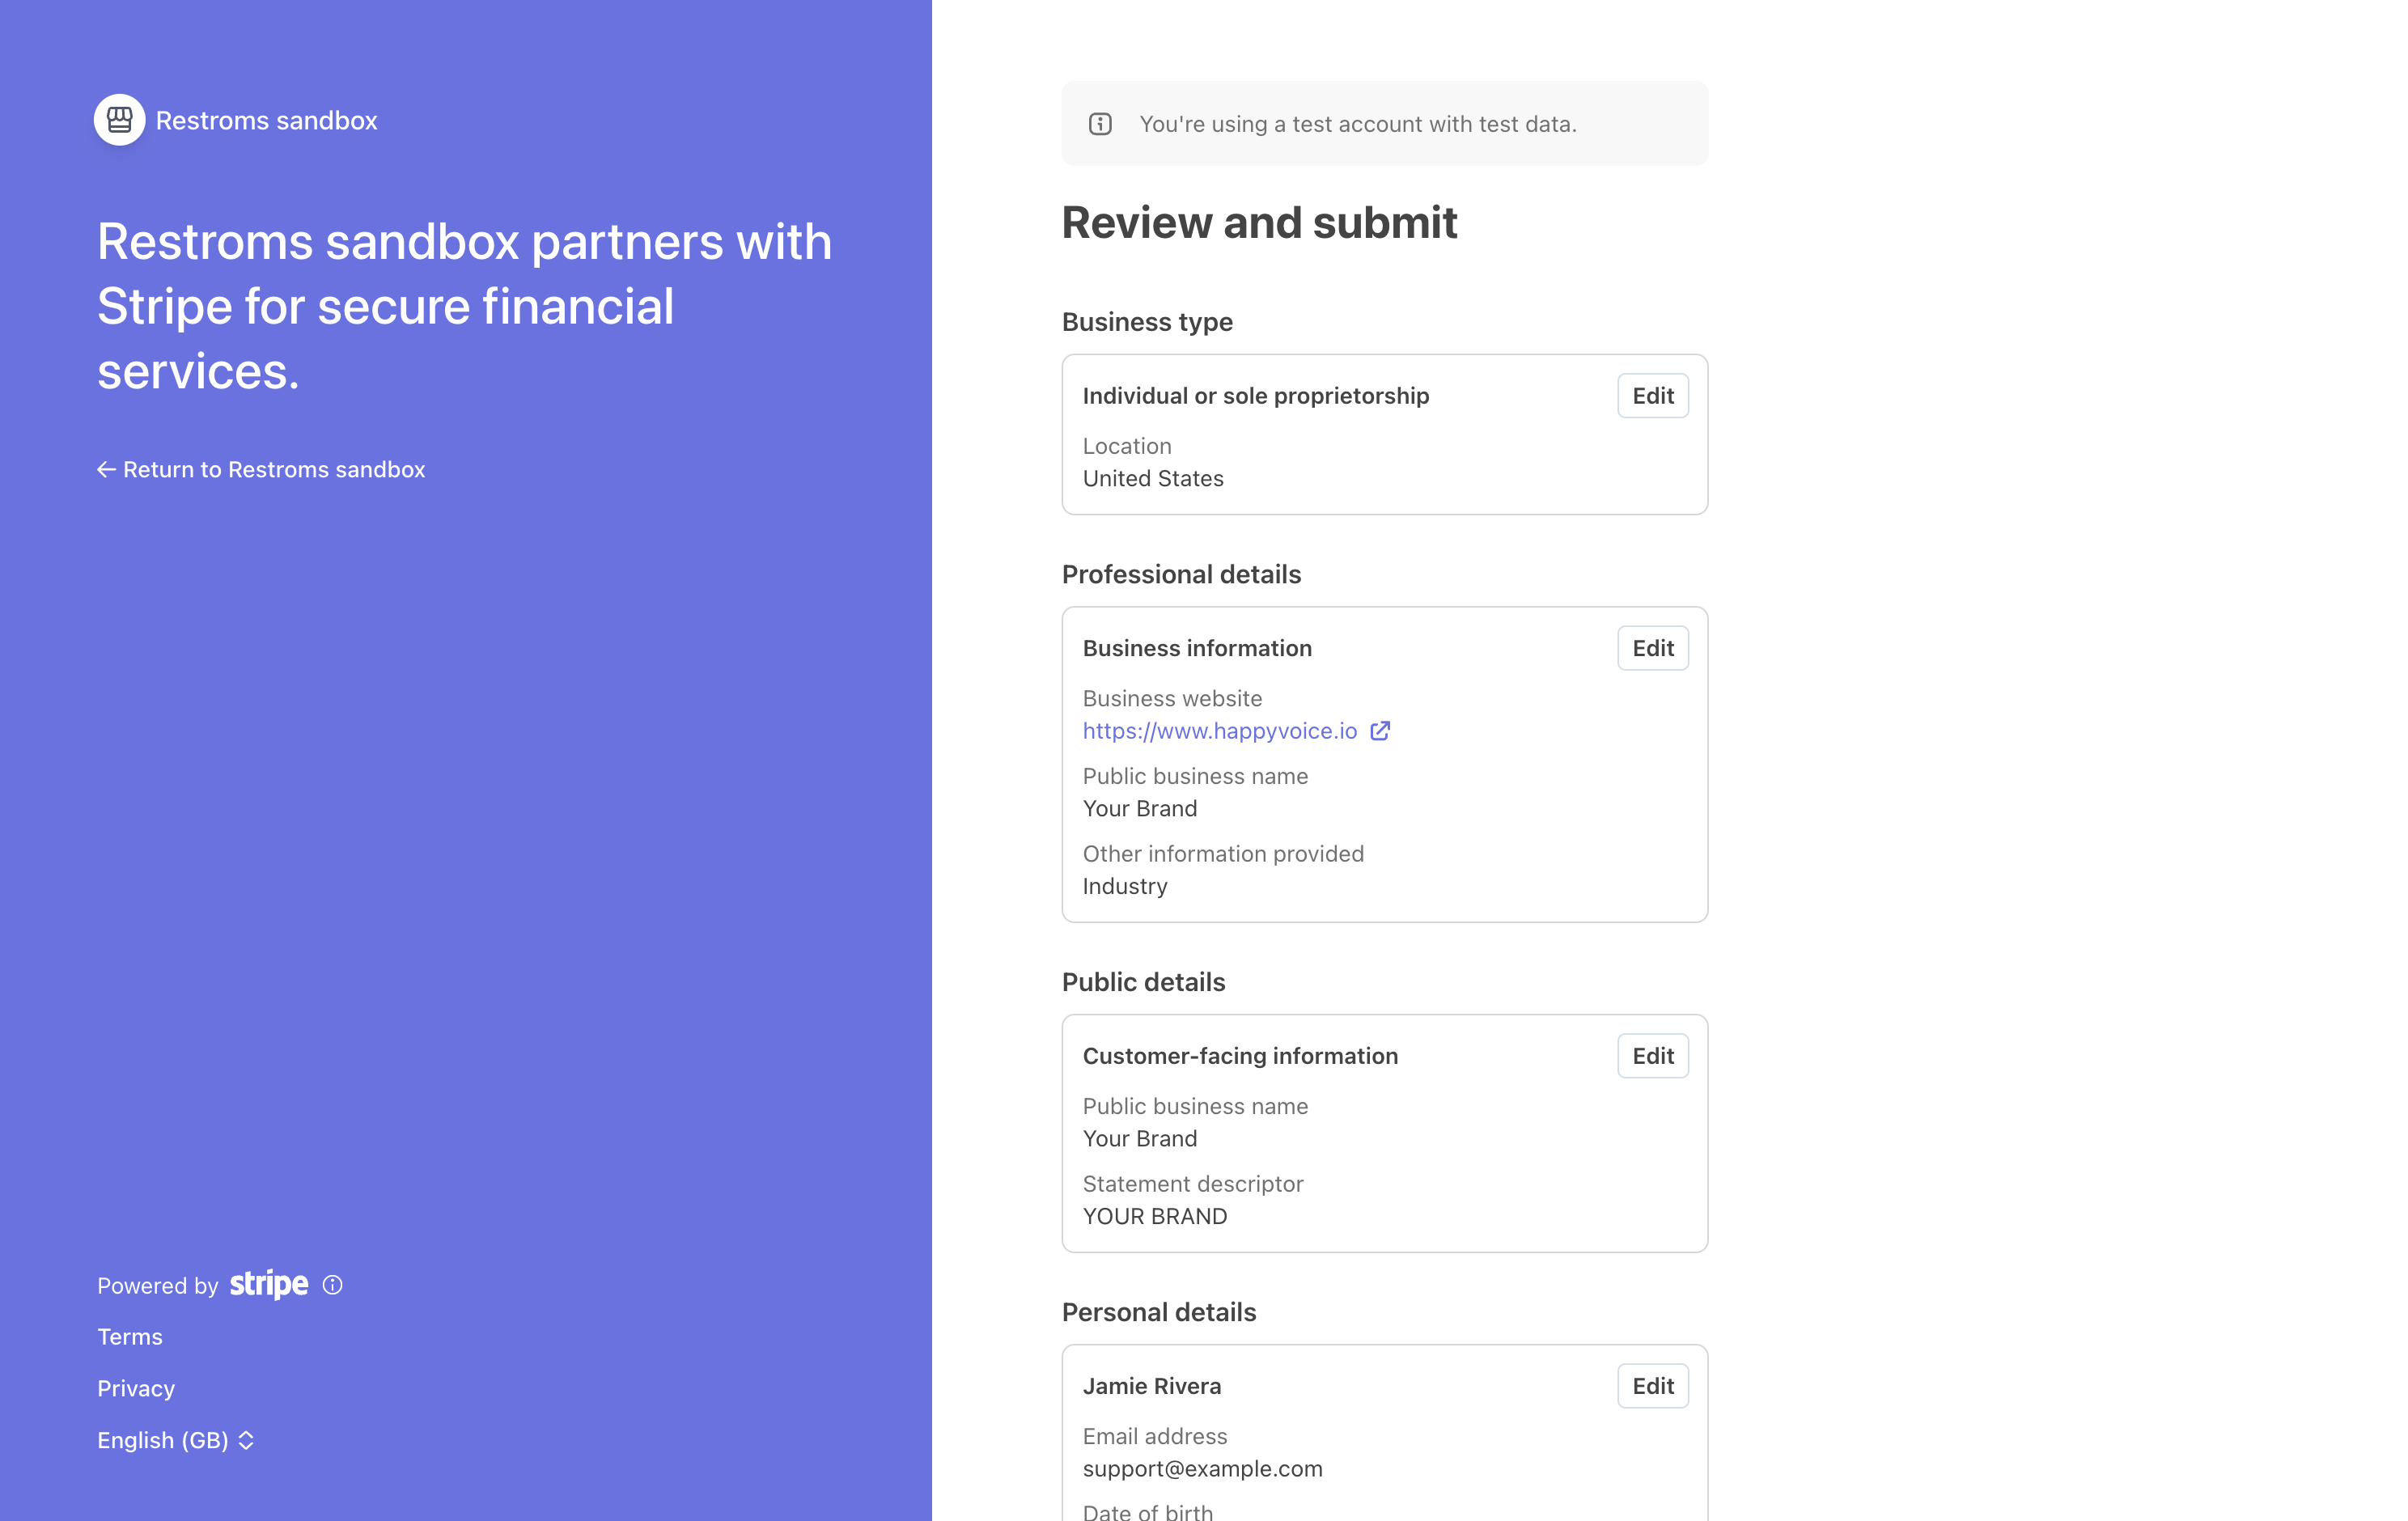
What to Check
- Business Type & Location: Ensure your country and entity type are accurate.
- Customer-facing Information: Review your statement descriptor (the text that appears on your restaurant clients' credit card statements, e.g.,
HAPPYVOICE.IOor your brand name). - Payout Account: Confirm the correct deposit bank account is selected.
Scroll to the bottom of the page to review the legal agreements:
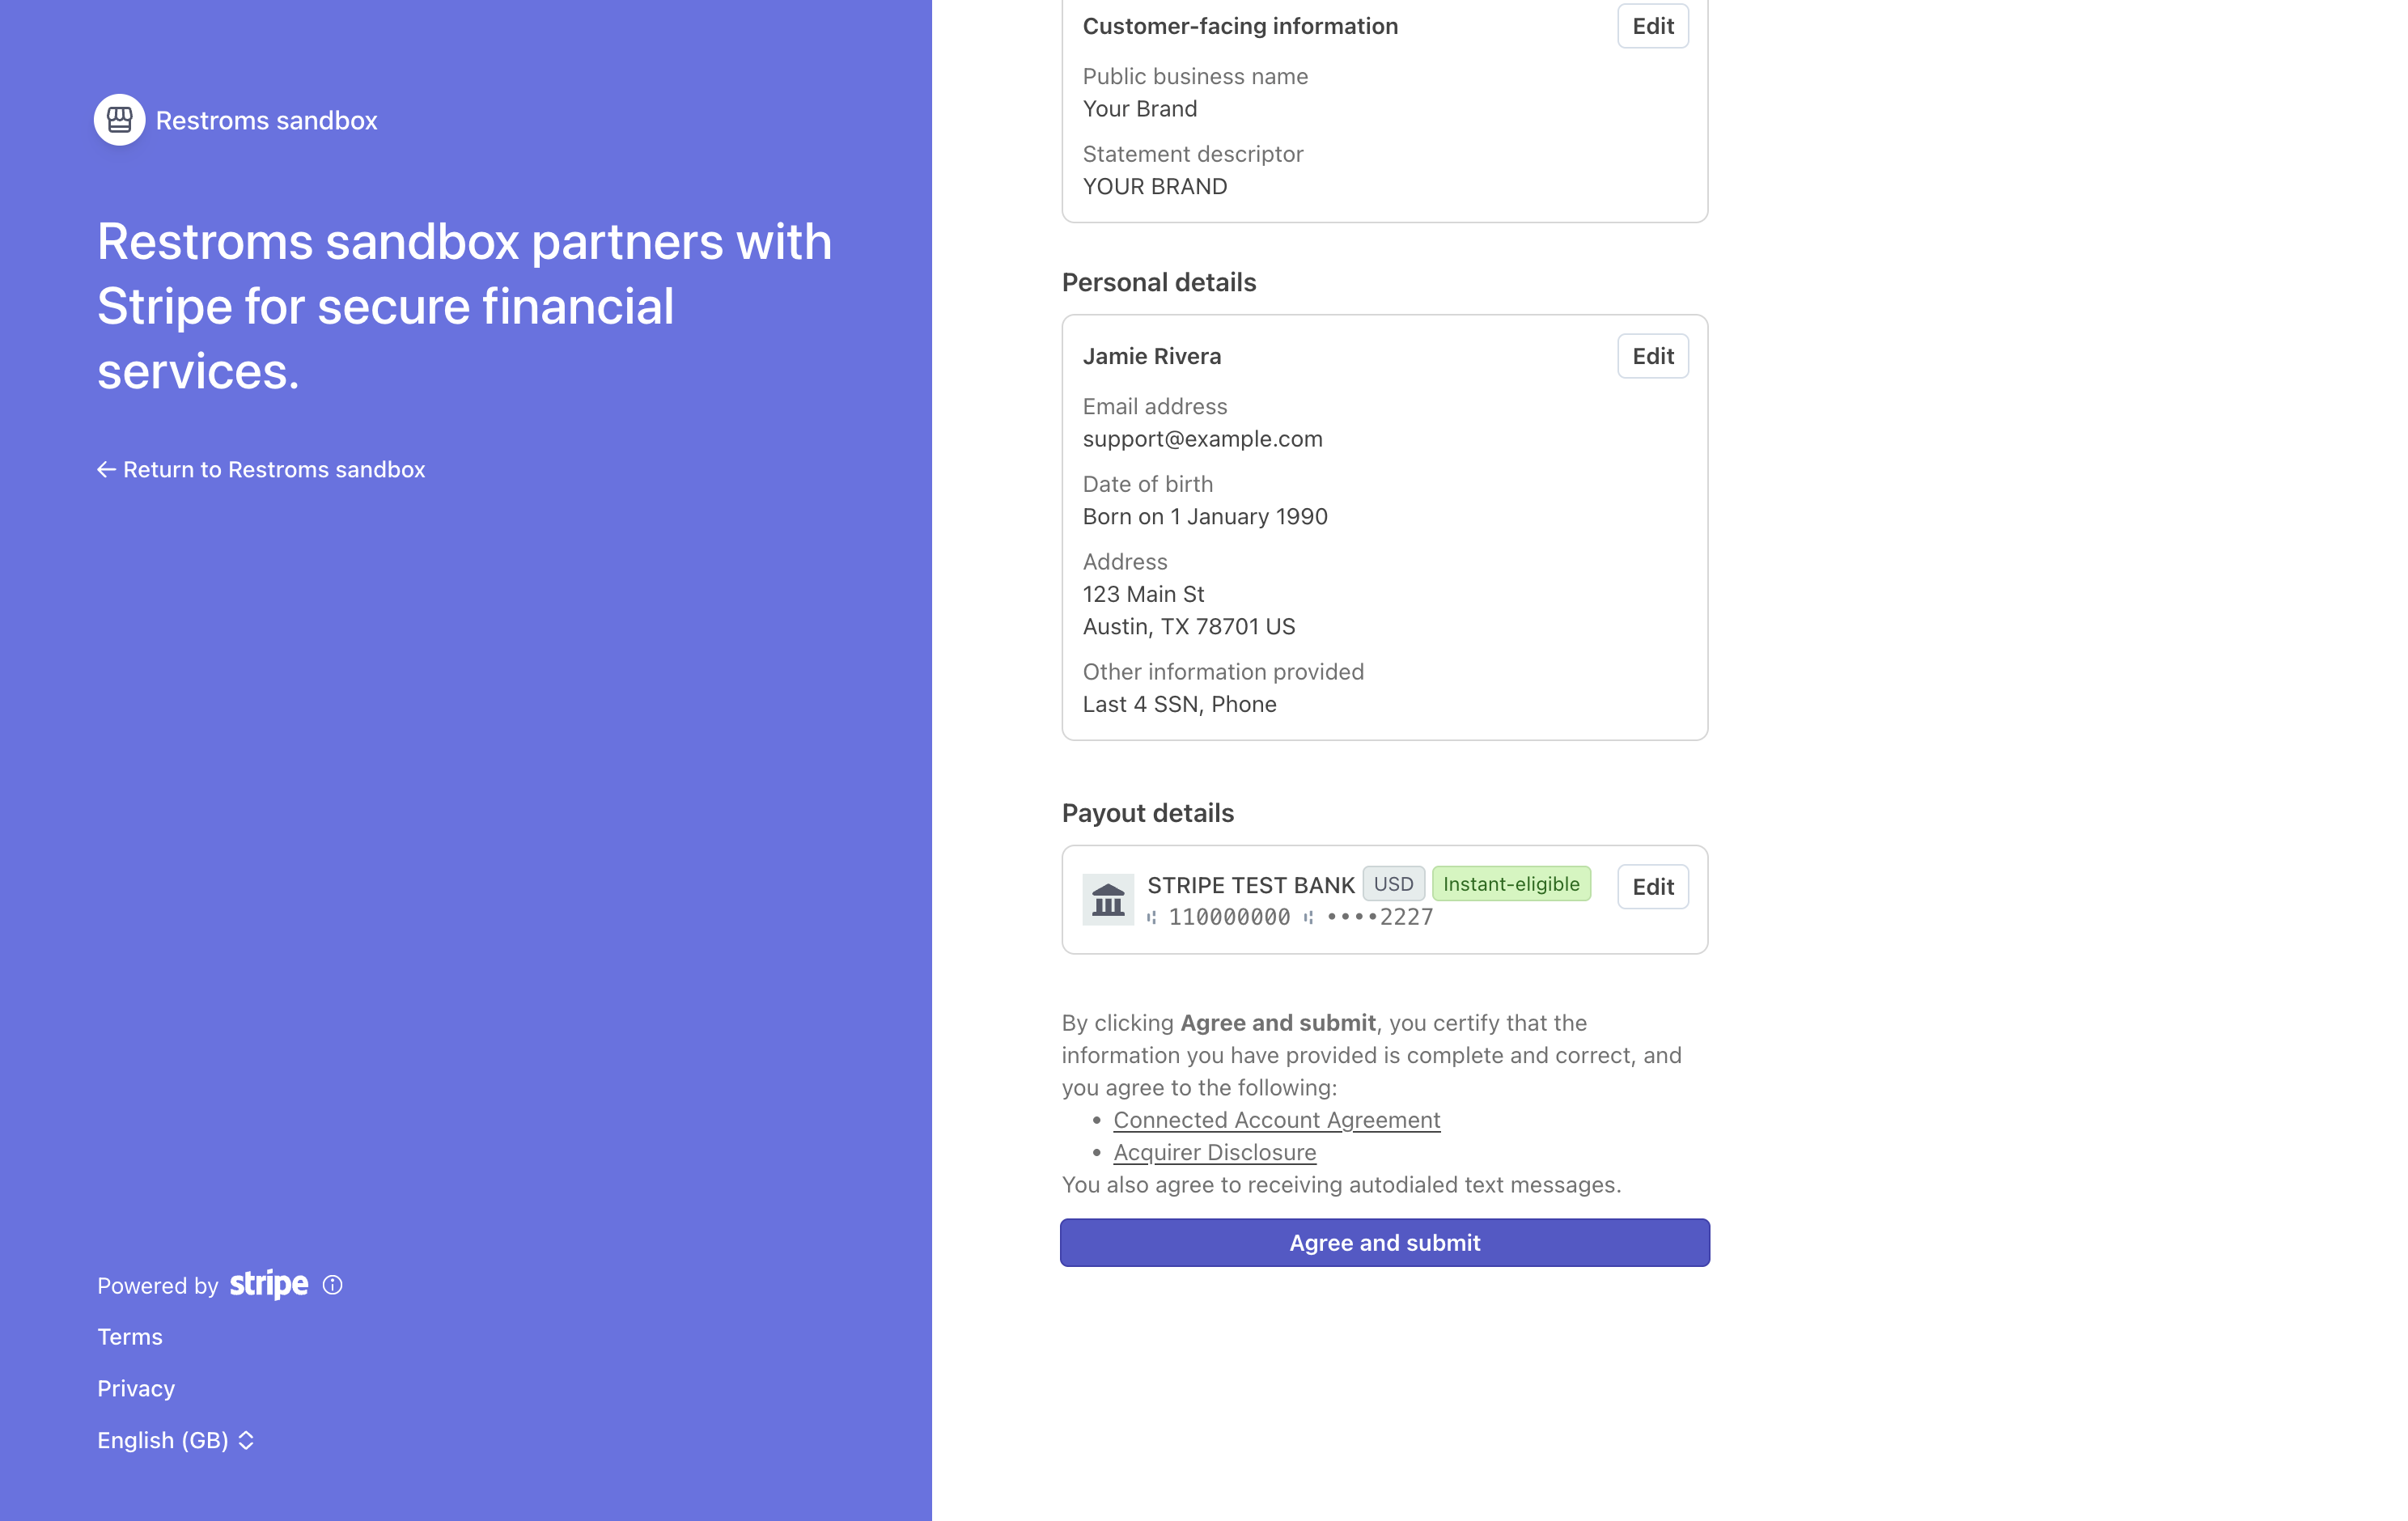
Read the Connected Account Agreement and Acquirer Disclosure, then press Agree and submit.
Step 6: Return to Your Dashboard
After submitting, Stripe automatically completes the account verification and redirects you back to your white-label dashboard.
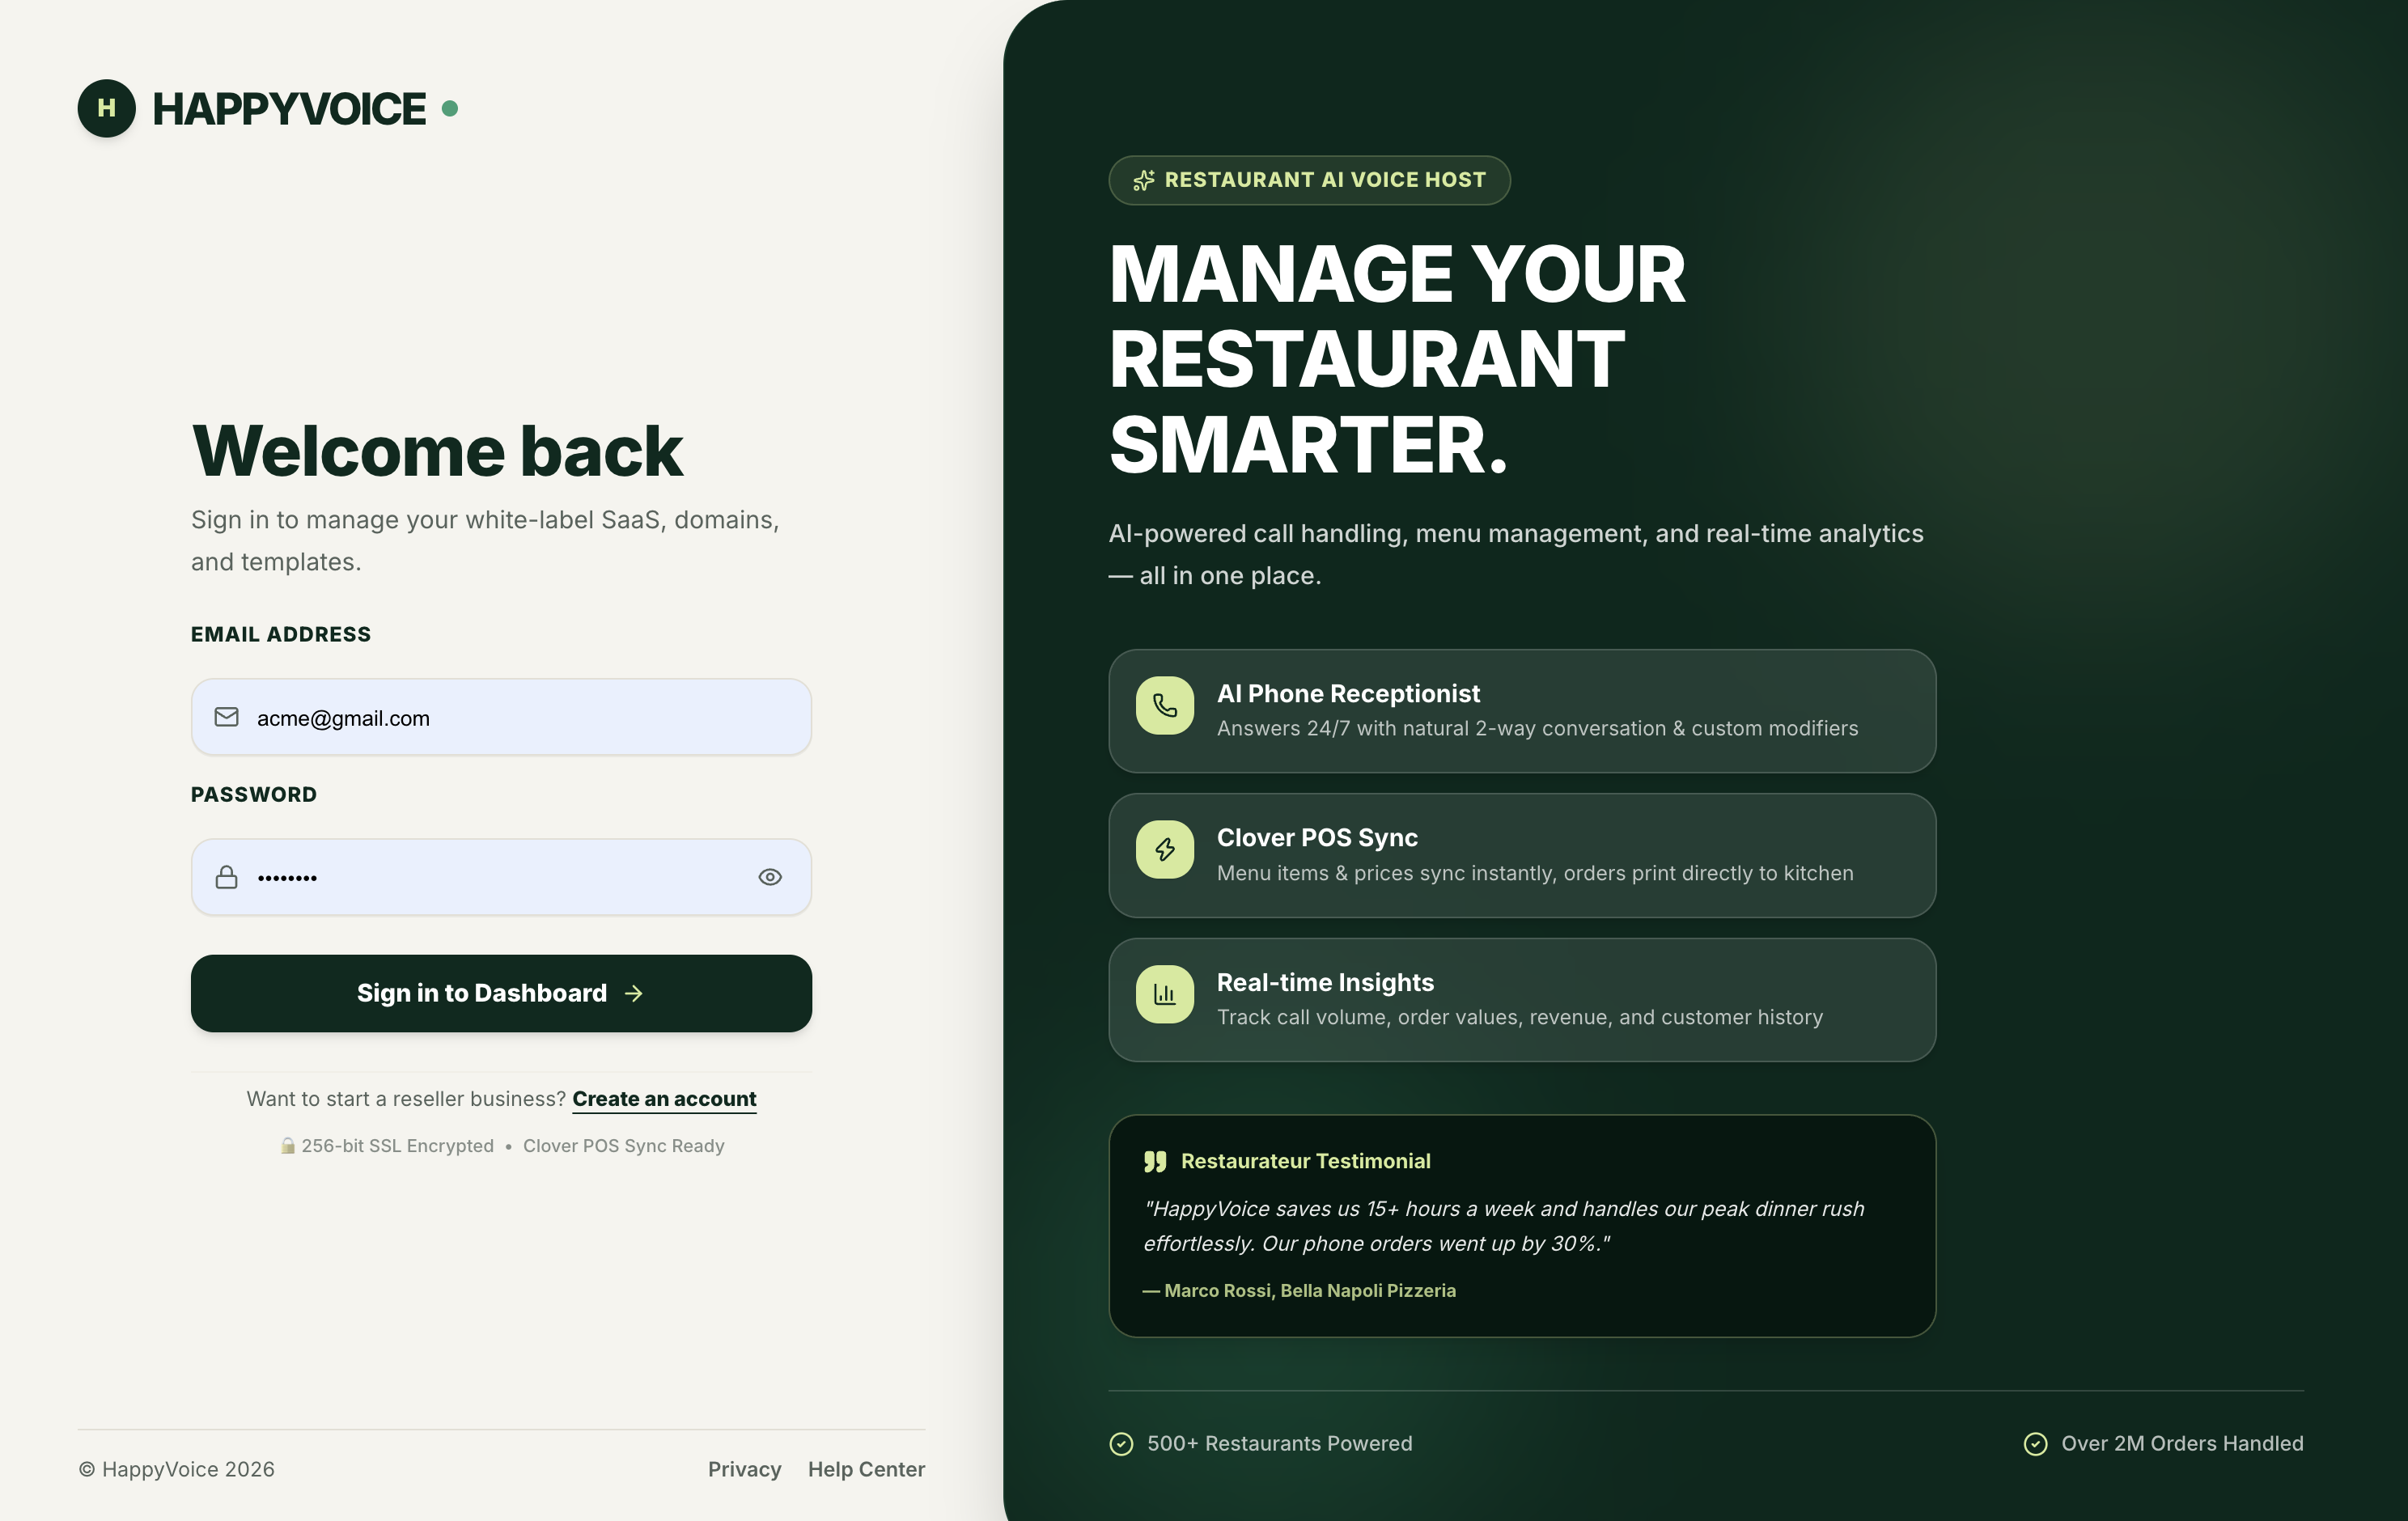
Your Stripe account status in Step 6 of onboarding will now show as Connected (Live), and the Restaurant Pricing Plan creation form will be fully unlocked.
Next Steps
Now that your Stripe account is live:
- Publish Restaurant Pricing Plans: Create monthly and annual subscription tiers for your restaurants.
- Platform Billing: Understand how platform fees and wholesale usage are billed.